Basalt in Flux
All the materials we use in ceramics come from the earth, formed by geological processes over
thousands or millions of years. It is easy to forget this when we buy pre-processed powders and
clays by the kilogram. The majority of the materials used to make glazes are powdered rocks that
have been chosen because of their particular chemical composition and are sourced from all over
the world. Historically materials would have been sourced locally, informing both the type of ware
made and its aesthetic.
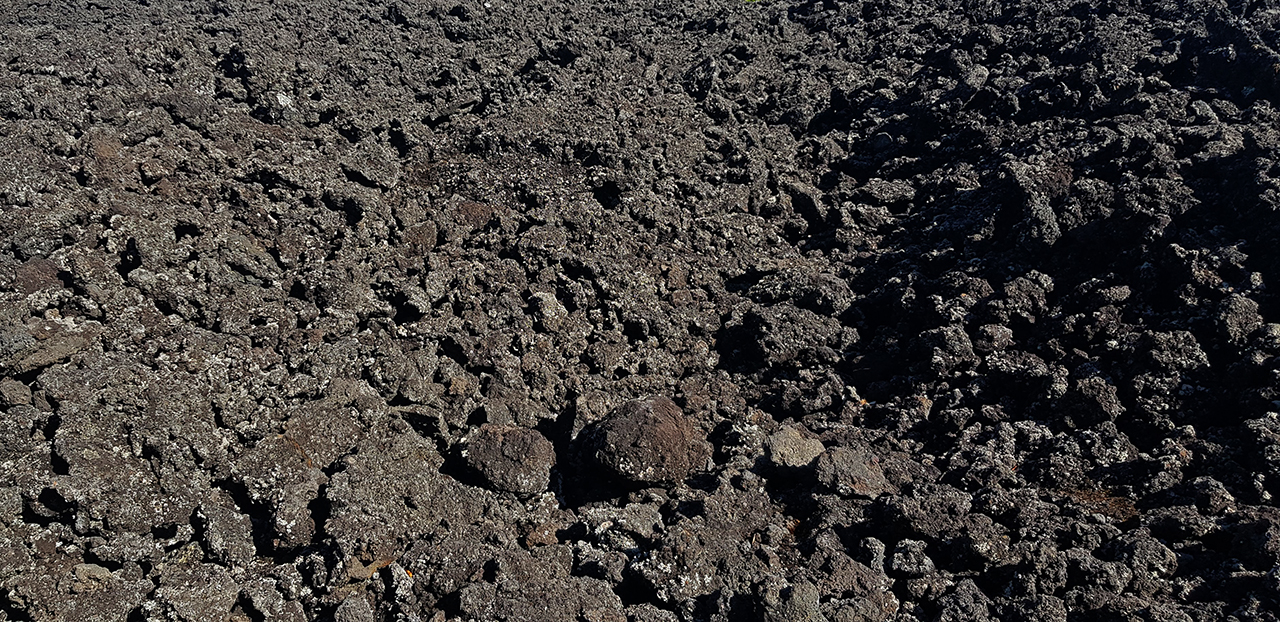
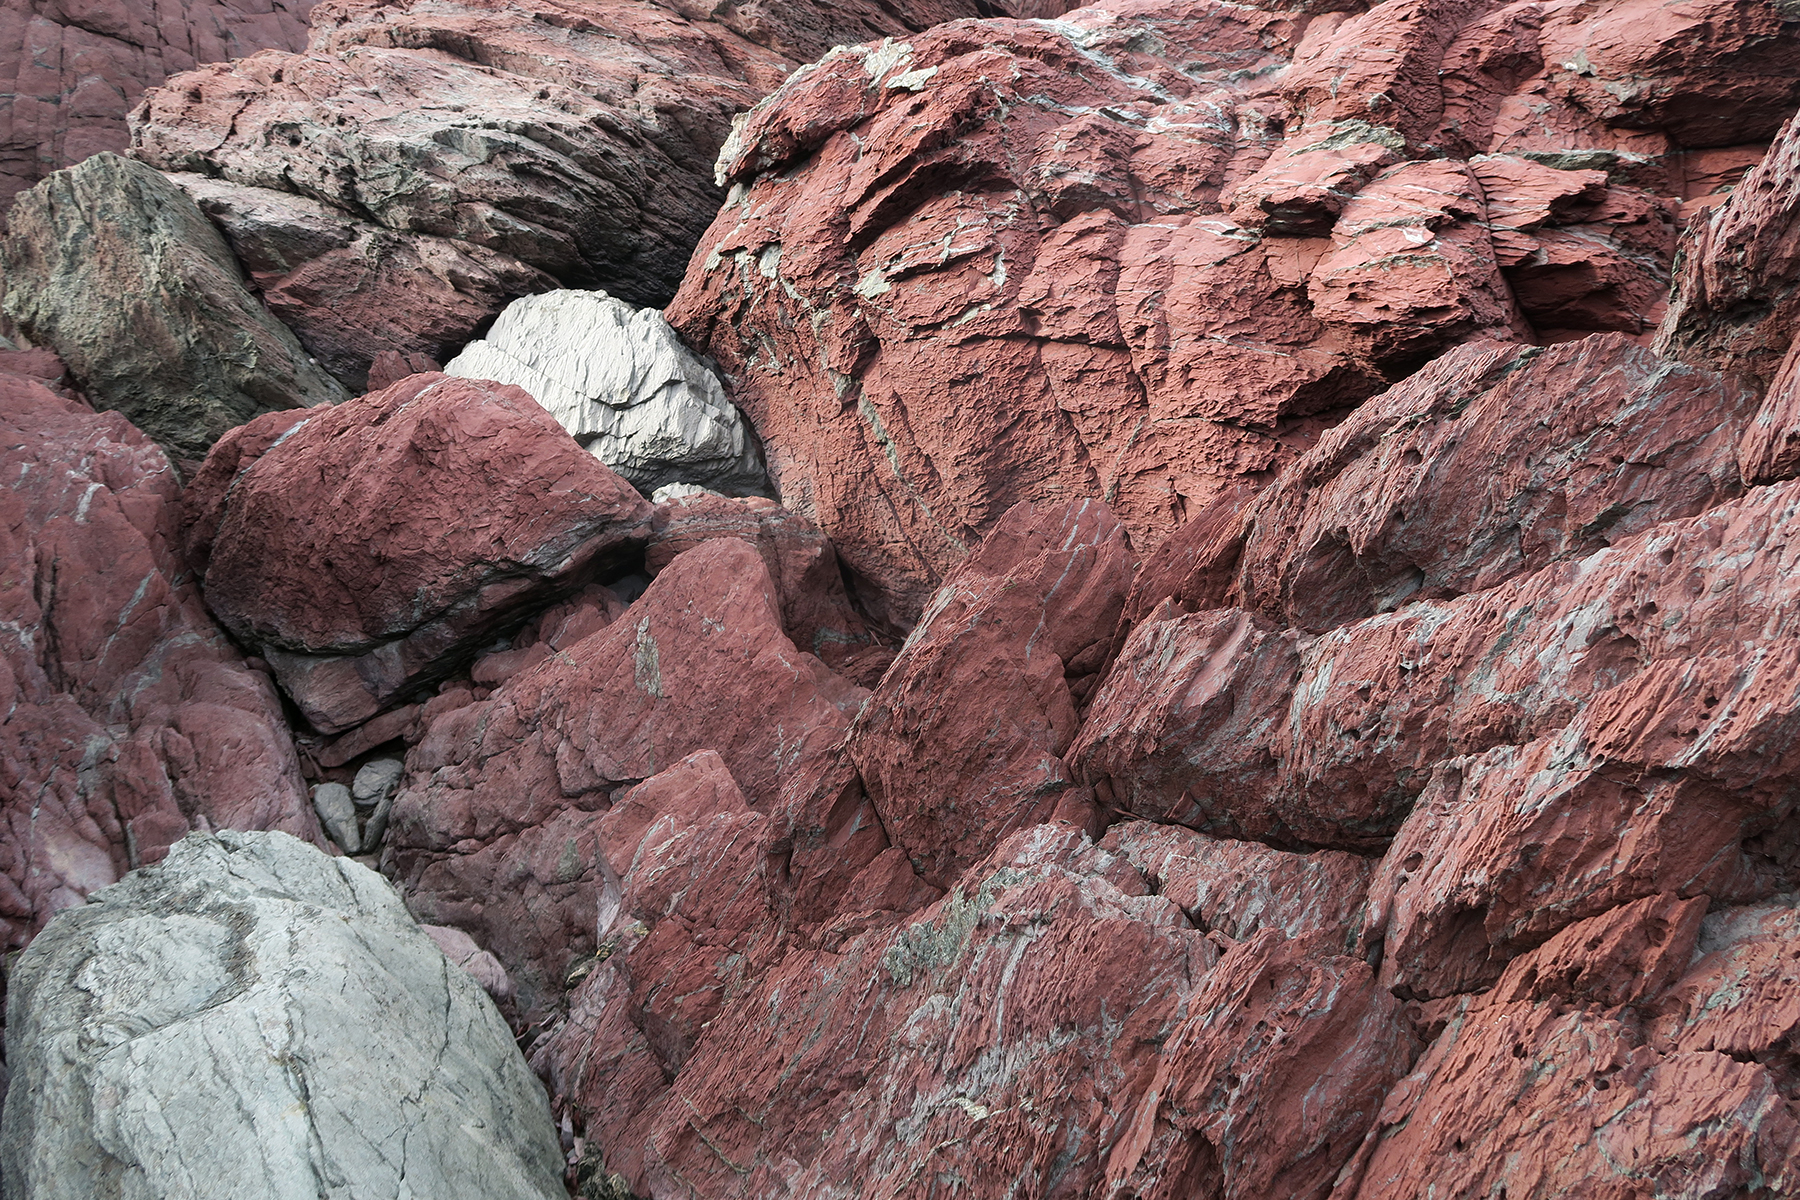
Rangitoto basalt feild, Photography by Grace Ryder
I wanted to create a glaze from a readily available, local material, that not only utilises the
chemistry of the local geology but also reflects it aesthetically in some way. Most of Tāmaki
Makaurau Auckland lies on basalt lava flows, the numerous maunga dotted around the city are the
remains of past eruptions. The most recent and iconic being Rangitoto, where chunks of basalt
still litter the surface of the dormant volcanic cone. Basalt has not only shaped the topology of the
city but also the built environment itself, it has been utilised in buildings, walls, roads and footpaths
for many years. Its abundance, accessibility and distinct visual characteristics made it an obvious
choice for this experiment.
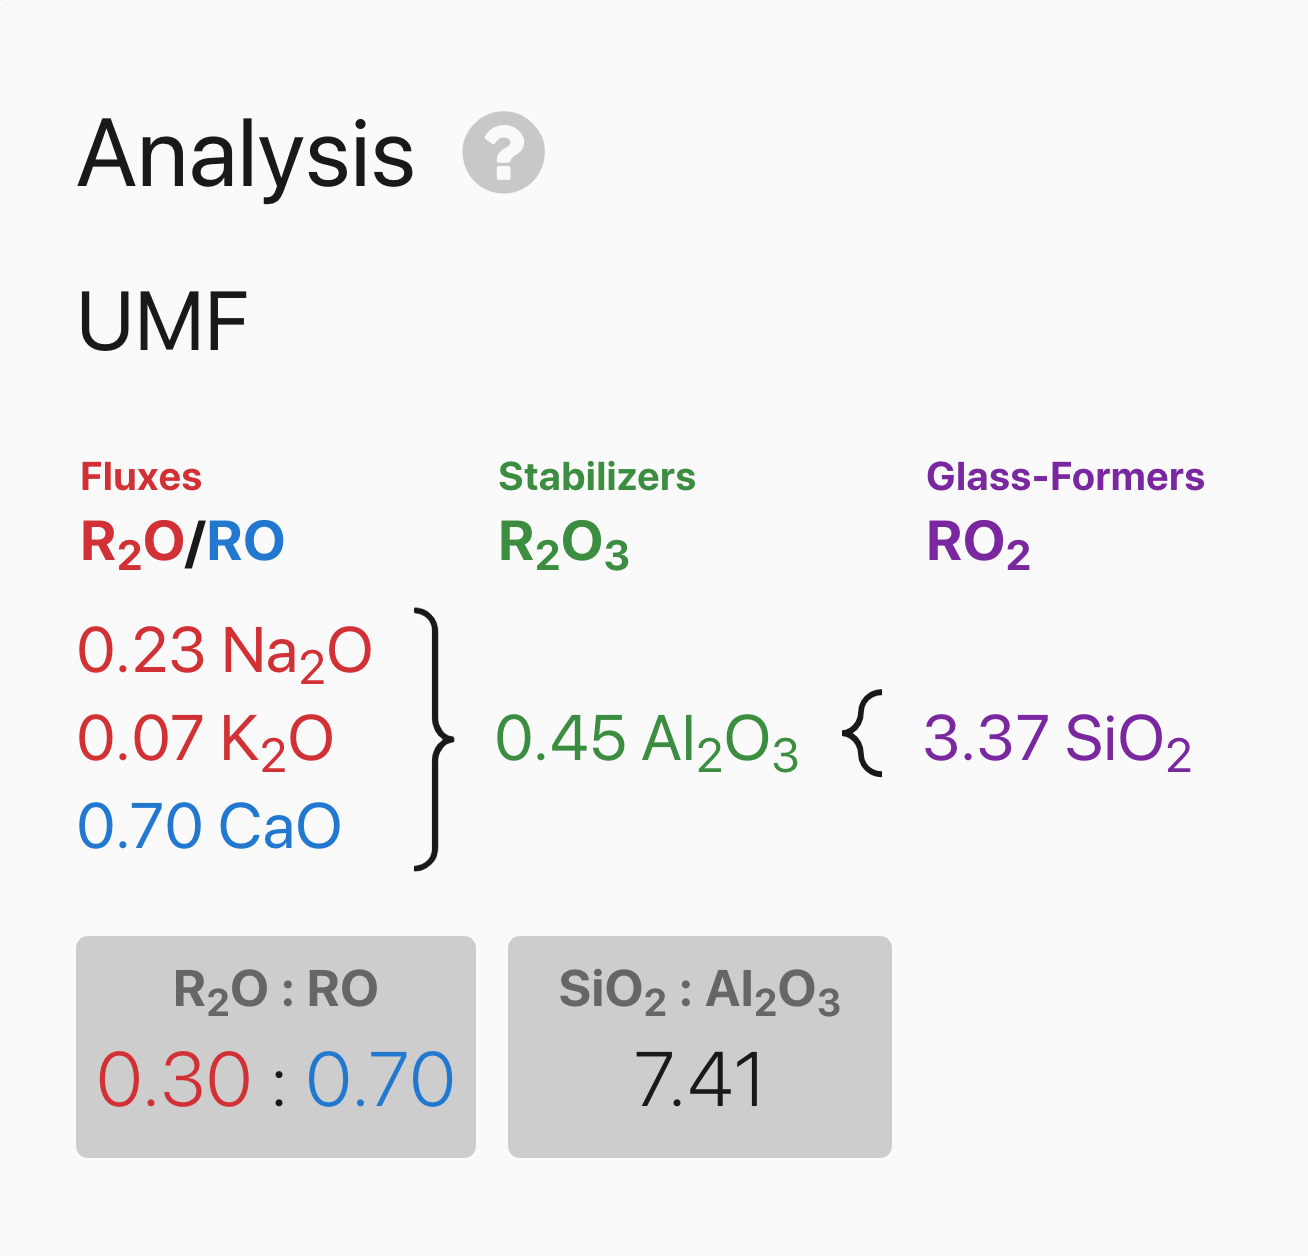
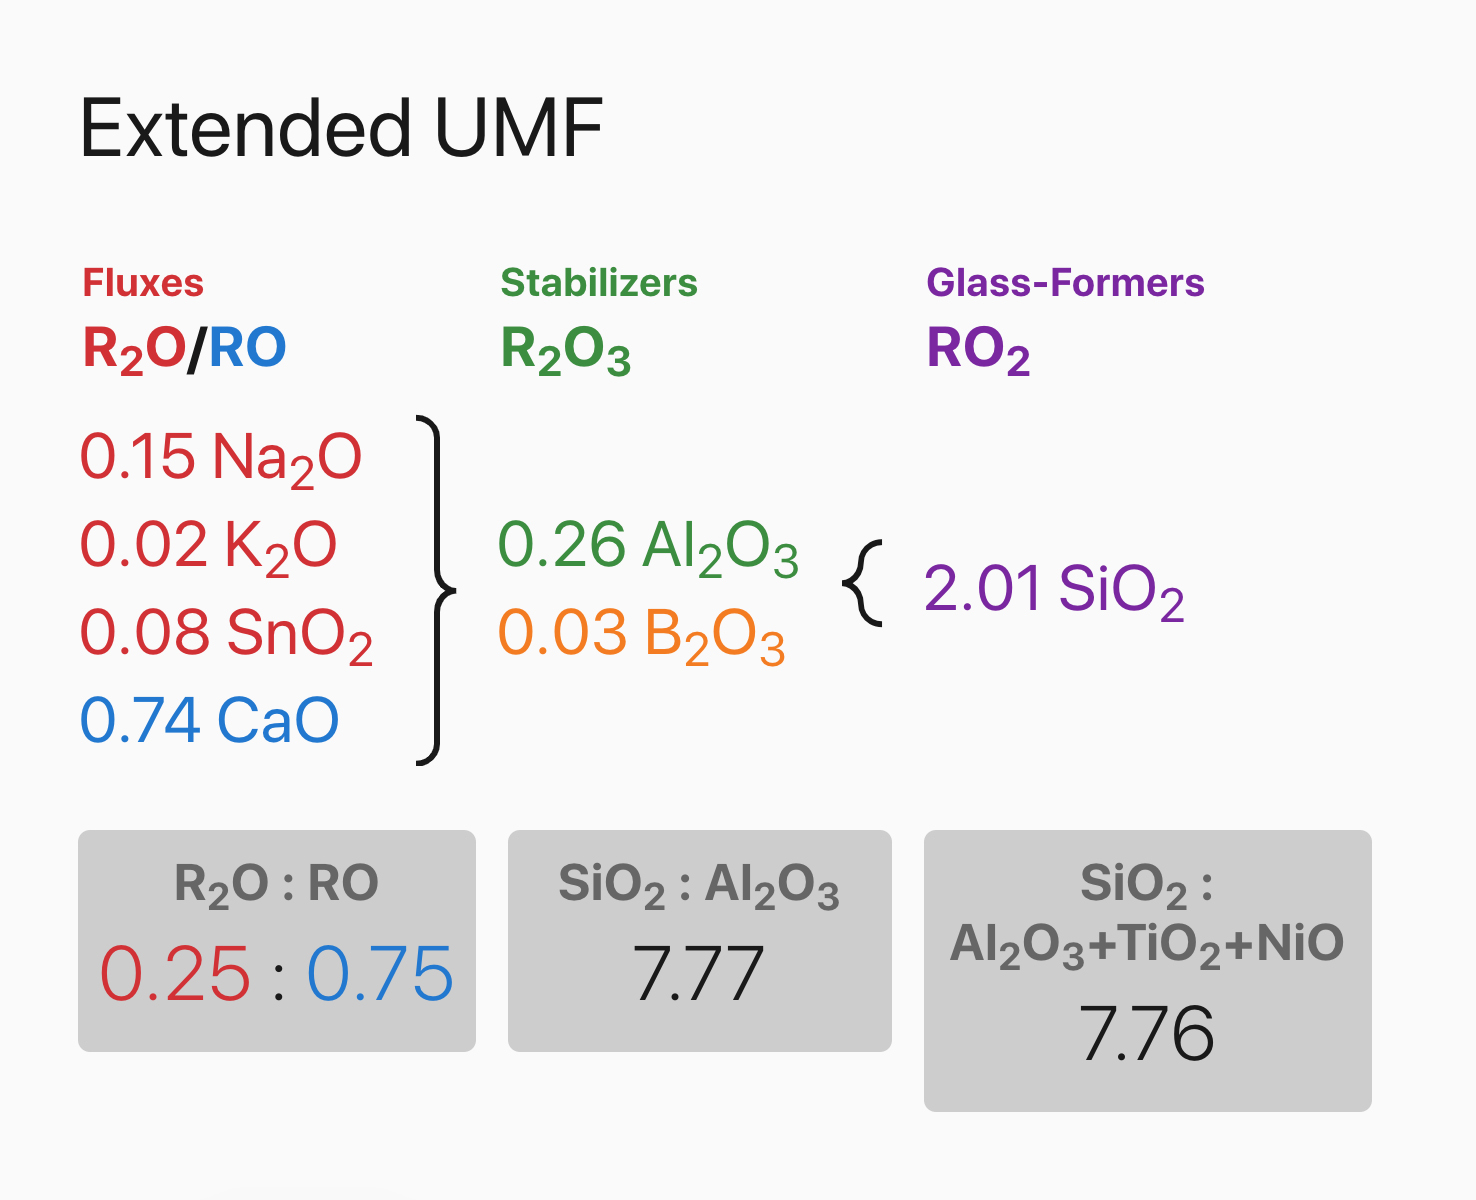
To understand how basalt could be used to create glazes, I’ll first break down what a glaze is, its
different components and why they are necessary. All glazes are predominantly made of silica
(SiO₂). By heating silica, deposited on the outside of pots as a powder, crystalline silica melts to form
a new amorphous solid–Glass.
On its own, silica has a very high melting point: around 1700°C. To do this at
temperatures achievable in kilns, it is necessary to lower the melting point by adding a flux. Fluxes
are certain metal oxides that help break silica’s crystalline bonds. There are two main groups of
fluxes, the alkaline metals; lithium, sodium, potassium; and the alkaline earth metals; magnesium,
calcium, barium, strontium and zinc. Zinc is technically not an alkaline earth but functions very
similarly to one.
Alumina (Al₂O₃) is the last key component of glazes and functions mainly as a stabilizer. It affects the melting temperature and fluidity of the glaze, and in certain concentrations forms microscopic
crystals in the glaze turning it matte. Alumina is mostly sourced from clay but feldspars also
contribute alumina to the glaze. The most common type of clay included in glazes is kaolin or ‘China
clay’. The addition of clay to glazes is also essential to suspend the glaze and stop hard panning.
Basalt is a rock that forms when molten lava cools at the earth’s surface and is rich in calcium and
magnesium. Other volcanic rocks like rhyolite, andesite and dacite, are formed the same way but
basalt has the highest concentrations of fluxes, making it more useful as a substitute for these
chemicals. Basalt also has a high concentration of iron oxide, which is what gives it its dark color. Iron
is one of the most common colorants used in ceramics and has a wide variety of appearances, from
blue and green to yellow, red, brown, and black. Glazes colored with iron can vary greatly between
oxidation and reduction firings.
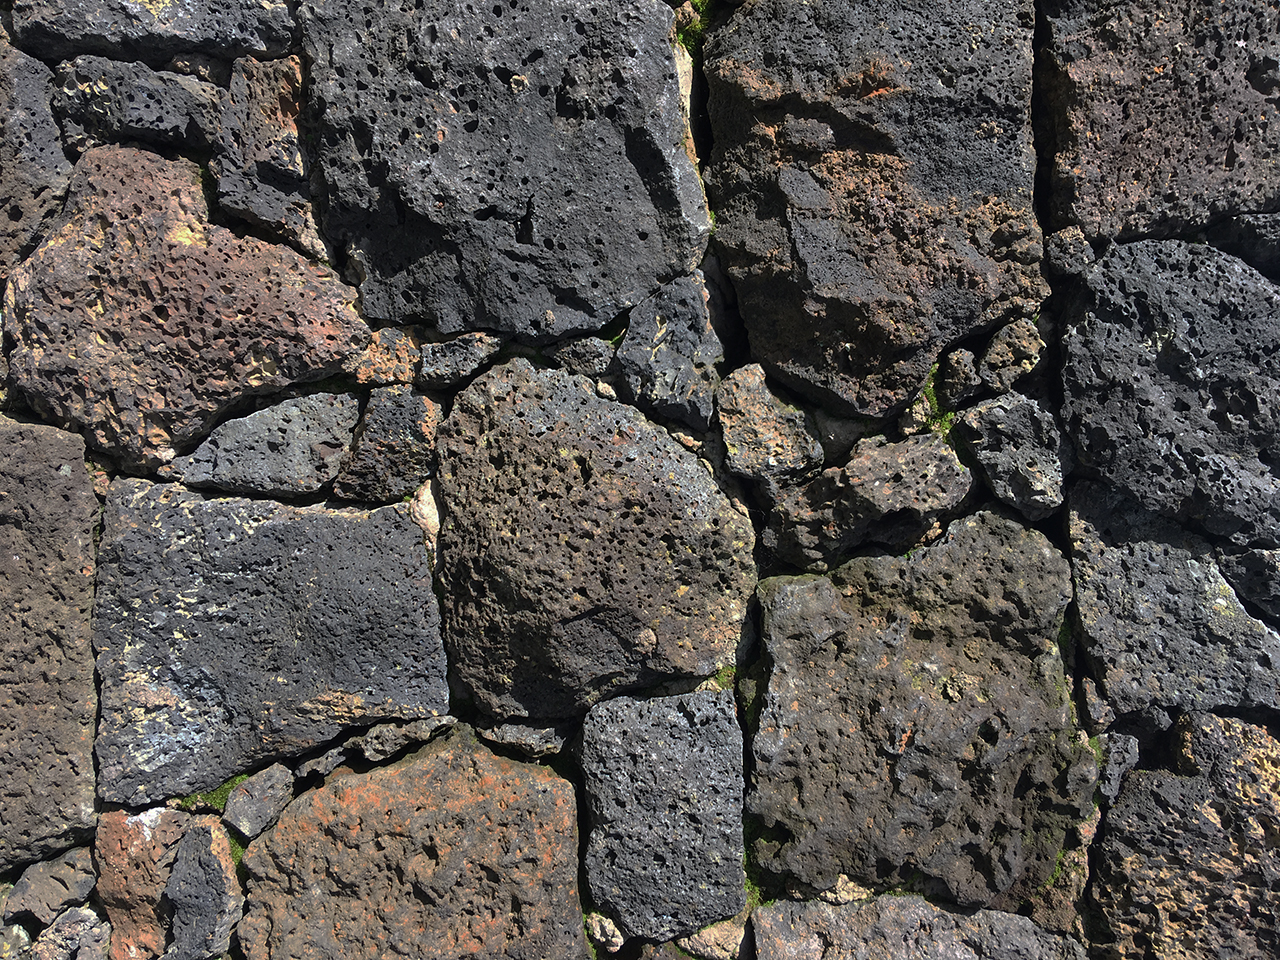
Tāmaki Makaurau basalt stone wall
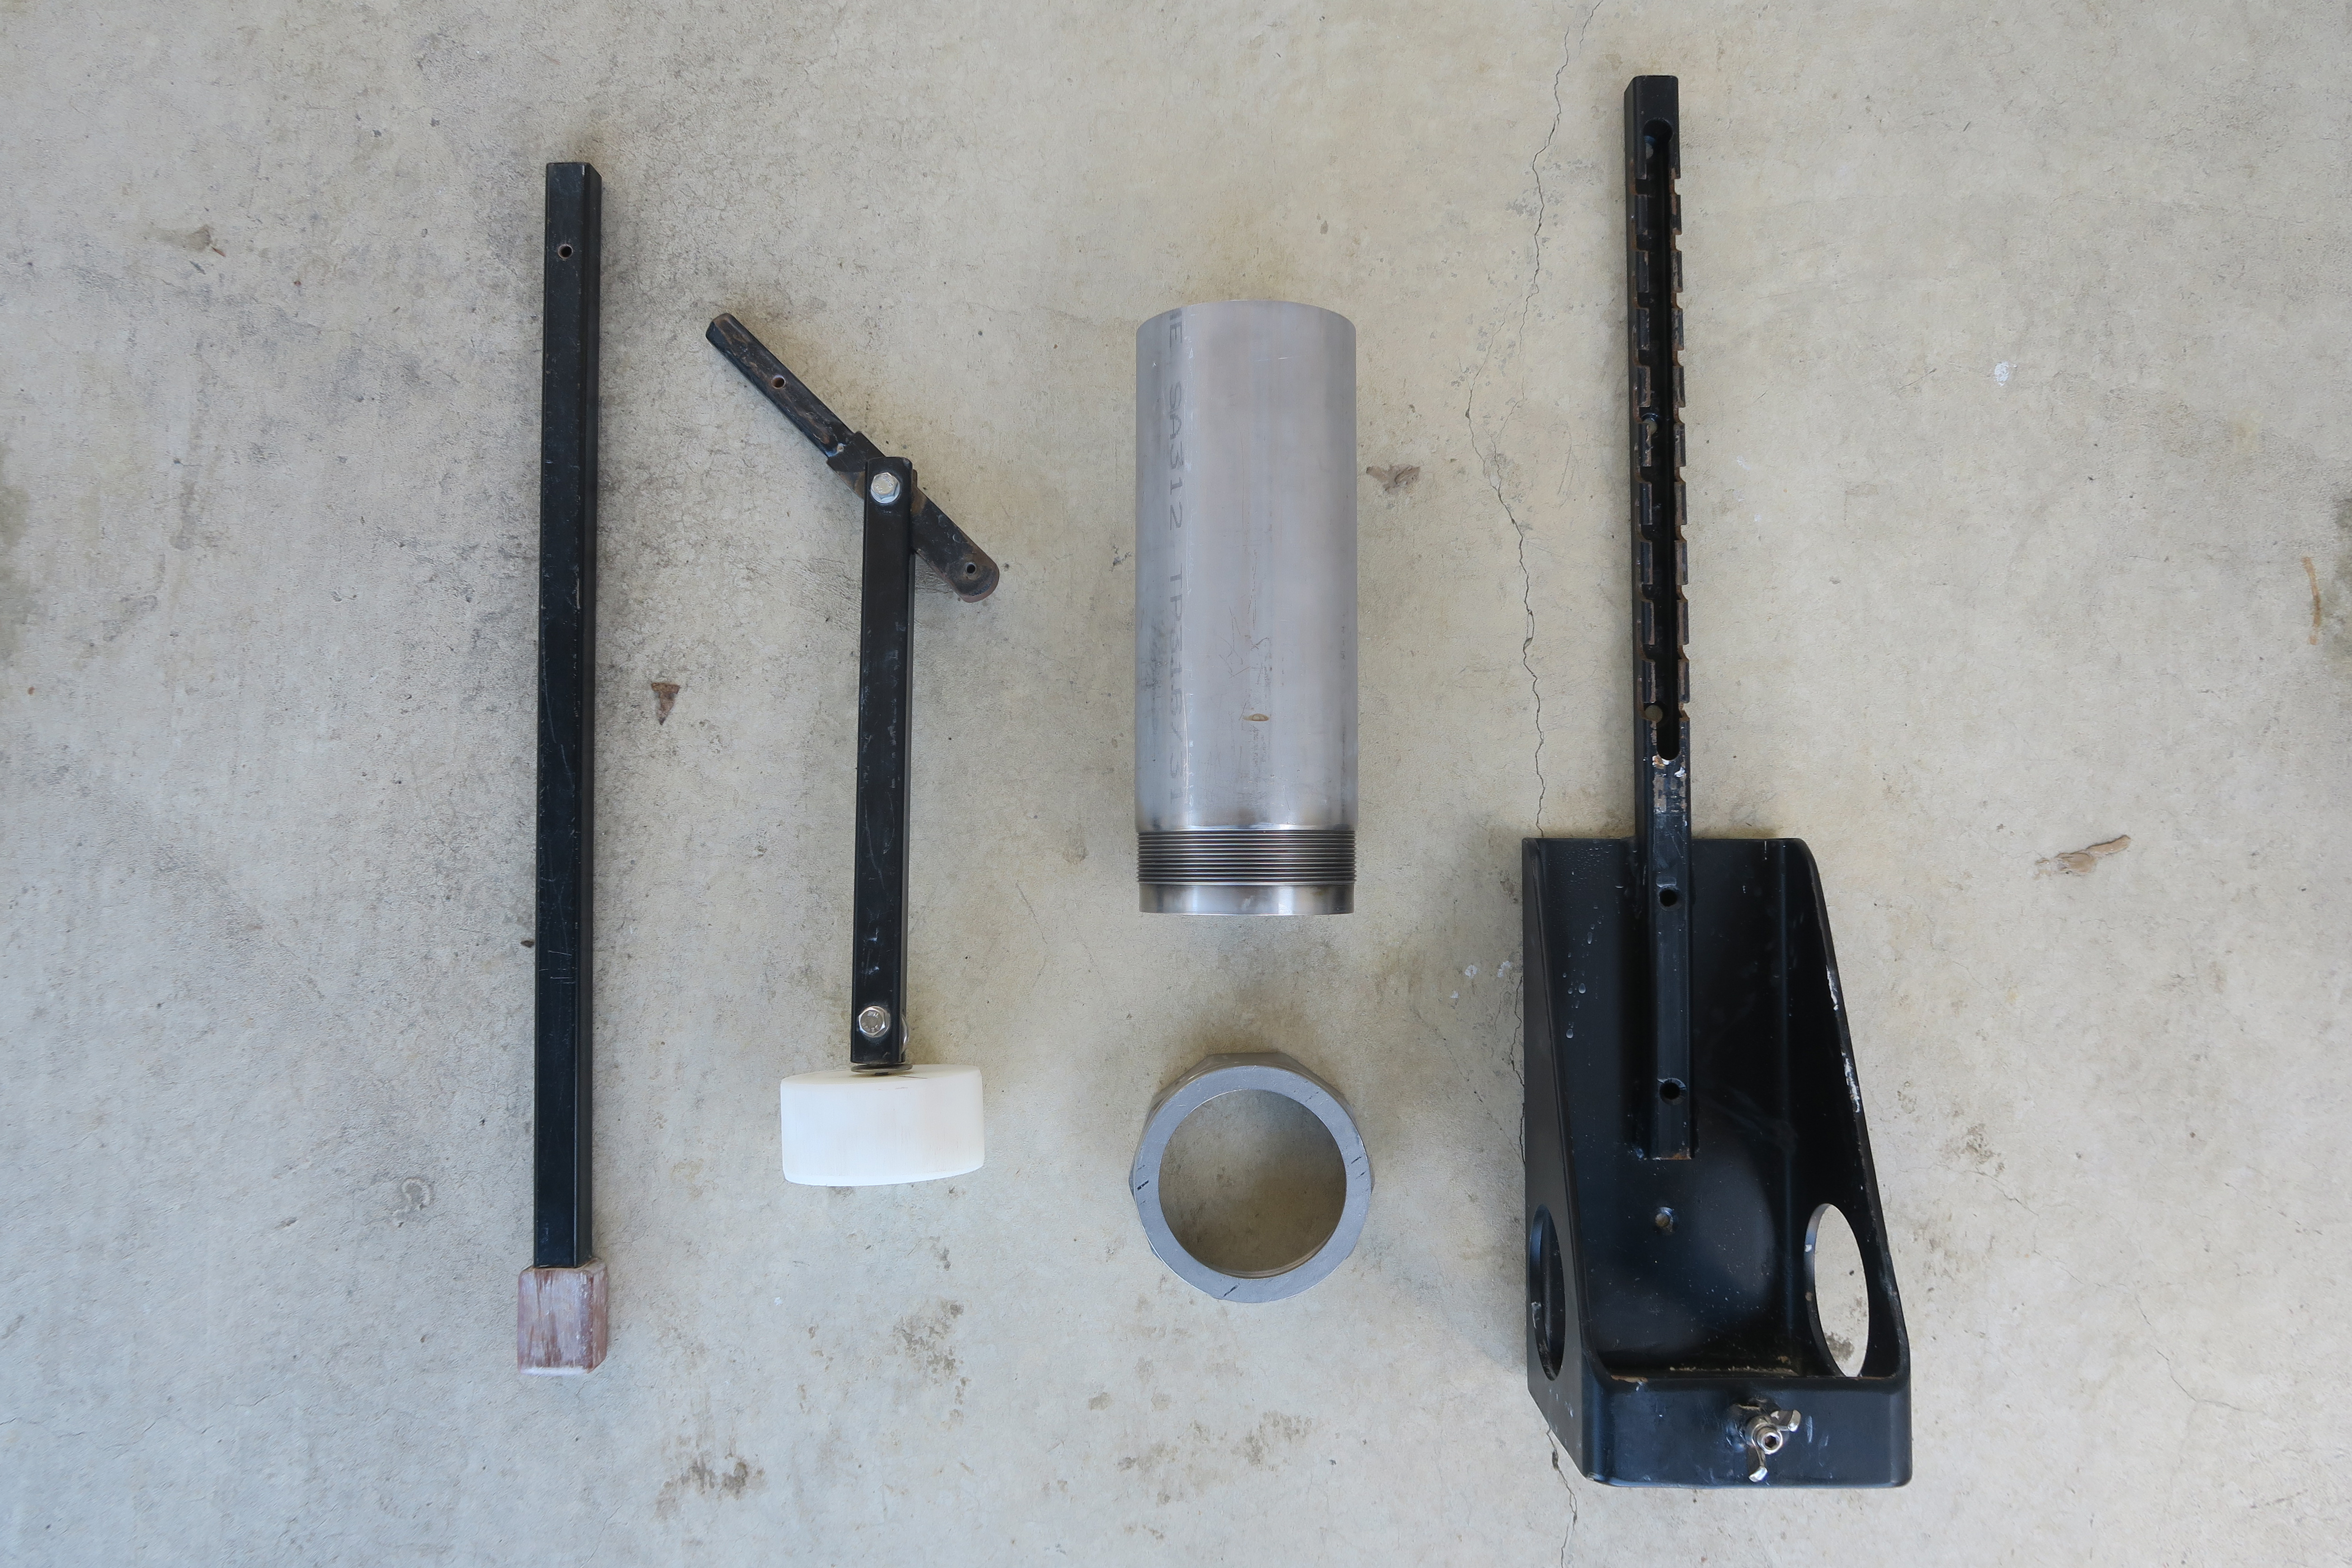
I obtained a suitable material for mixing glazes by crushing up waste debris from a Tāmaki Makaurau
basalt stone wall. The large chips were smashed up then ground into as fine a powder as possible
with a small mill. I then sieved all the material through a 100 mesh sieve to obtain a powder of similar
fineness to the other materials.
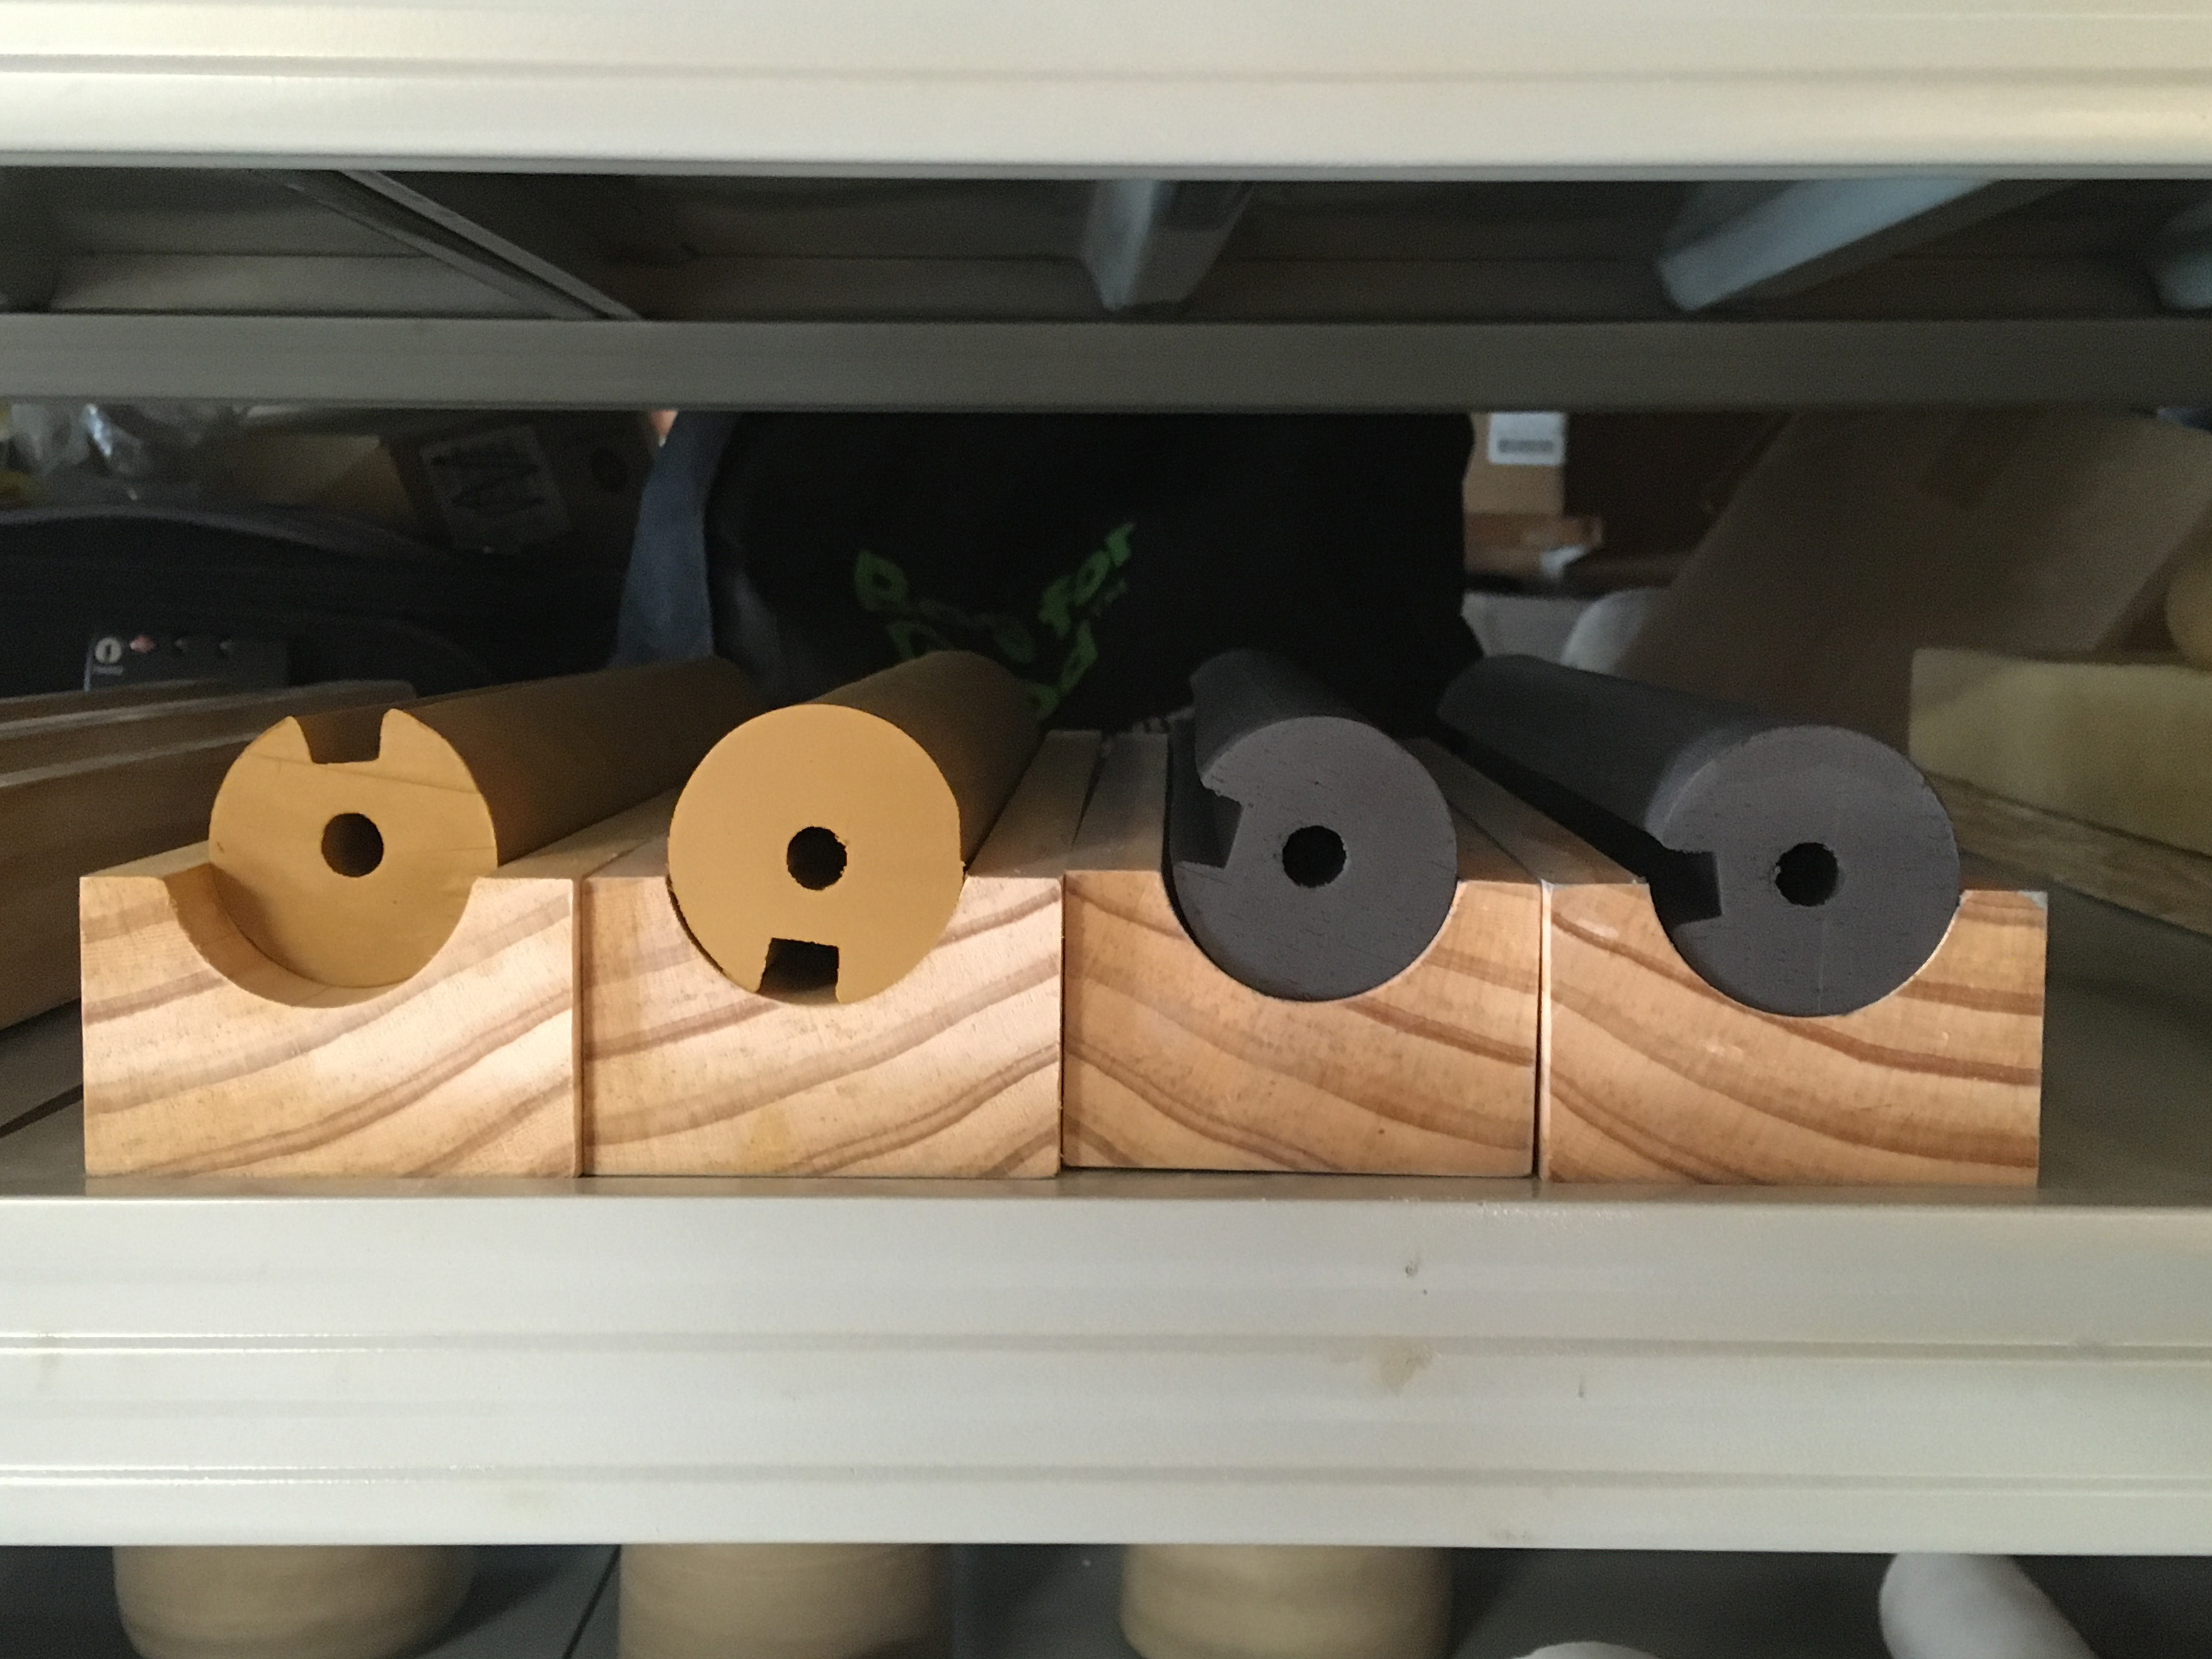
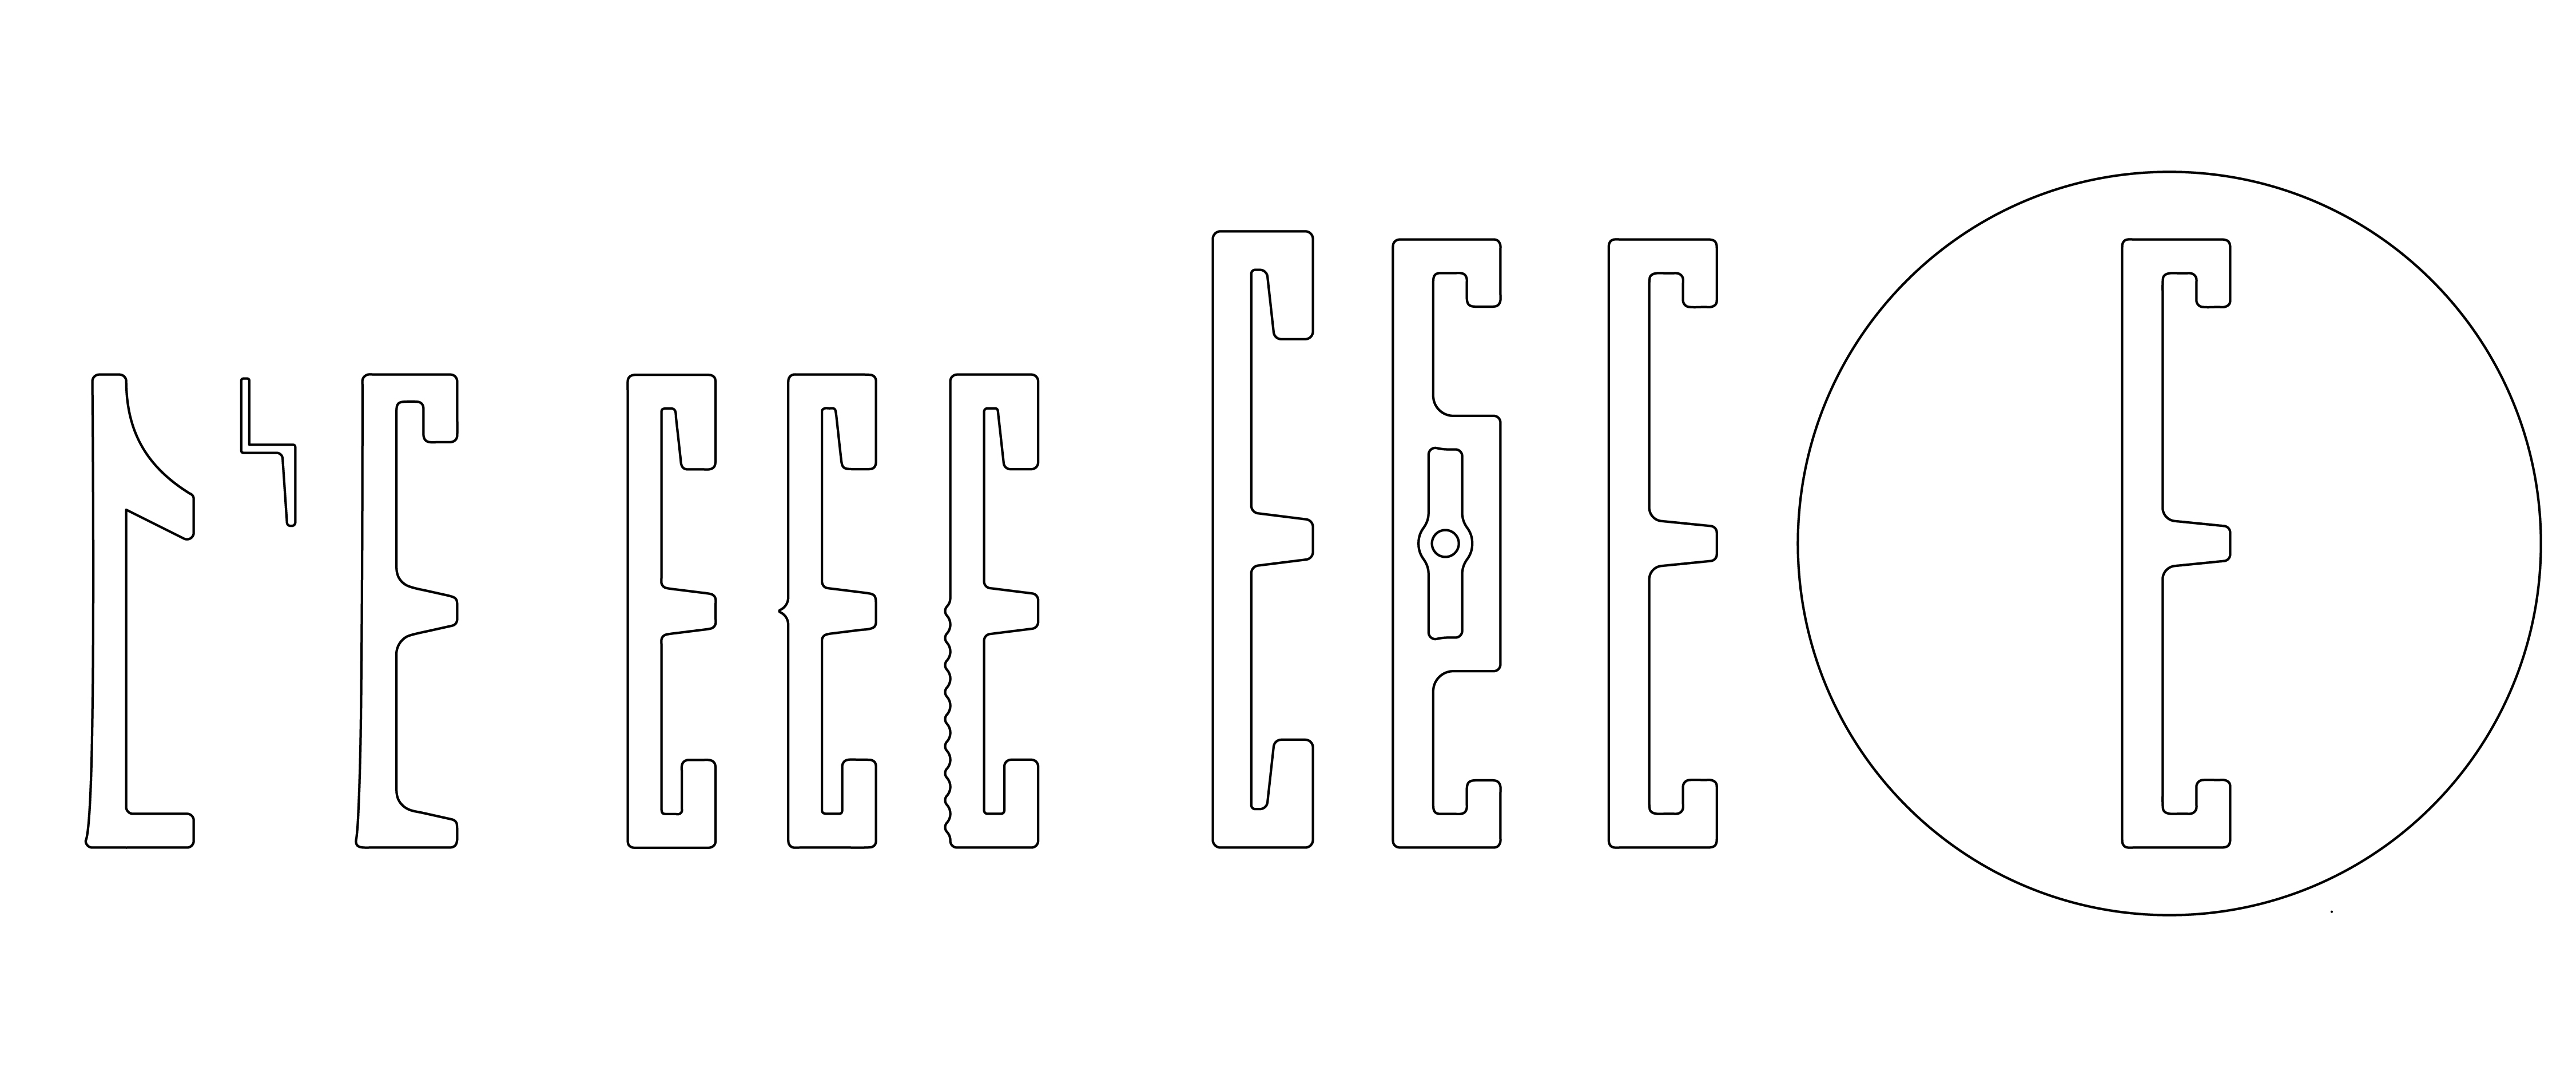
I formulated four recipes each with the same ingredients in different proportions using Basalt as the
main source of fluxes. Below is a biaxial blend of the four different glaze recipes. From left to right is
increasing silica in proportion to the fluxes. Bottom to top is increasing alumina in proportion to the
fluxes. Rather than just mixing a few glazes to test, using volumetric blending in this way is a very
efficient method to test materials and capture the full potential of what glazes they can create. This
is particularly helpful when the exact chemistry of your materials isn’t known.
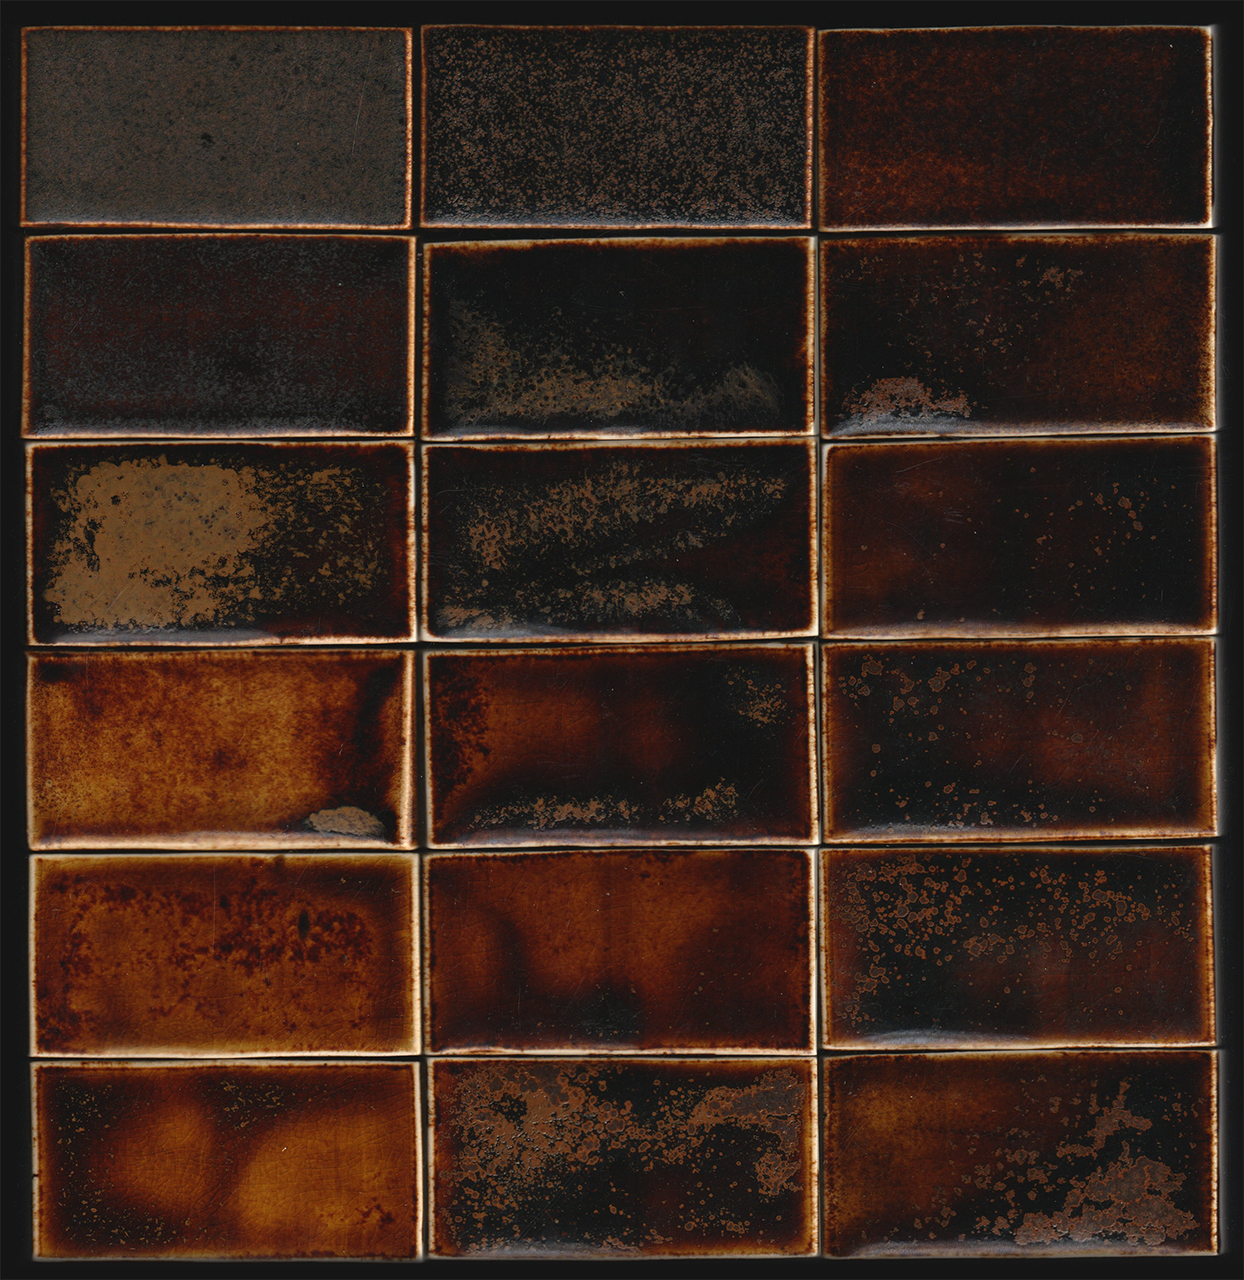
Basalt glaze biaxel blend, Increasing SiO₂(up) and Al₂O₃(right)
The glazes near the top left-hand corner have enough alumina to matte the surface. The variation of
colour you can see, from amber to black, is due to changes in the amount of iron in the glaze.
The glazes near the bottom of this blend fall in the crystalline region. The crystalline region is where the
flux levels are high enough that when cooled slowly or held at specific temperatures visible crystals can
start growing with the glaze.
From this initial series of tests I was most interested in the matte glazes as they reflect the textural
qualities and colour of basalt.
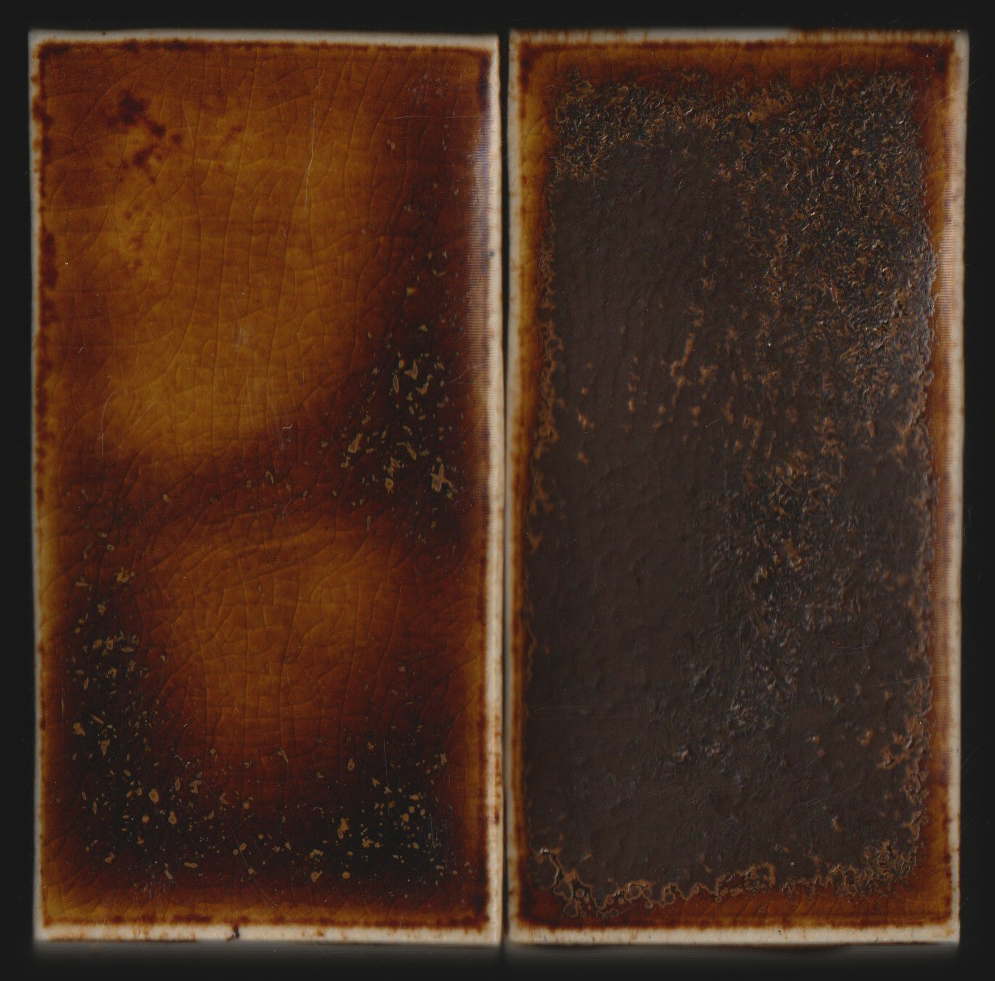
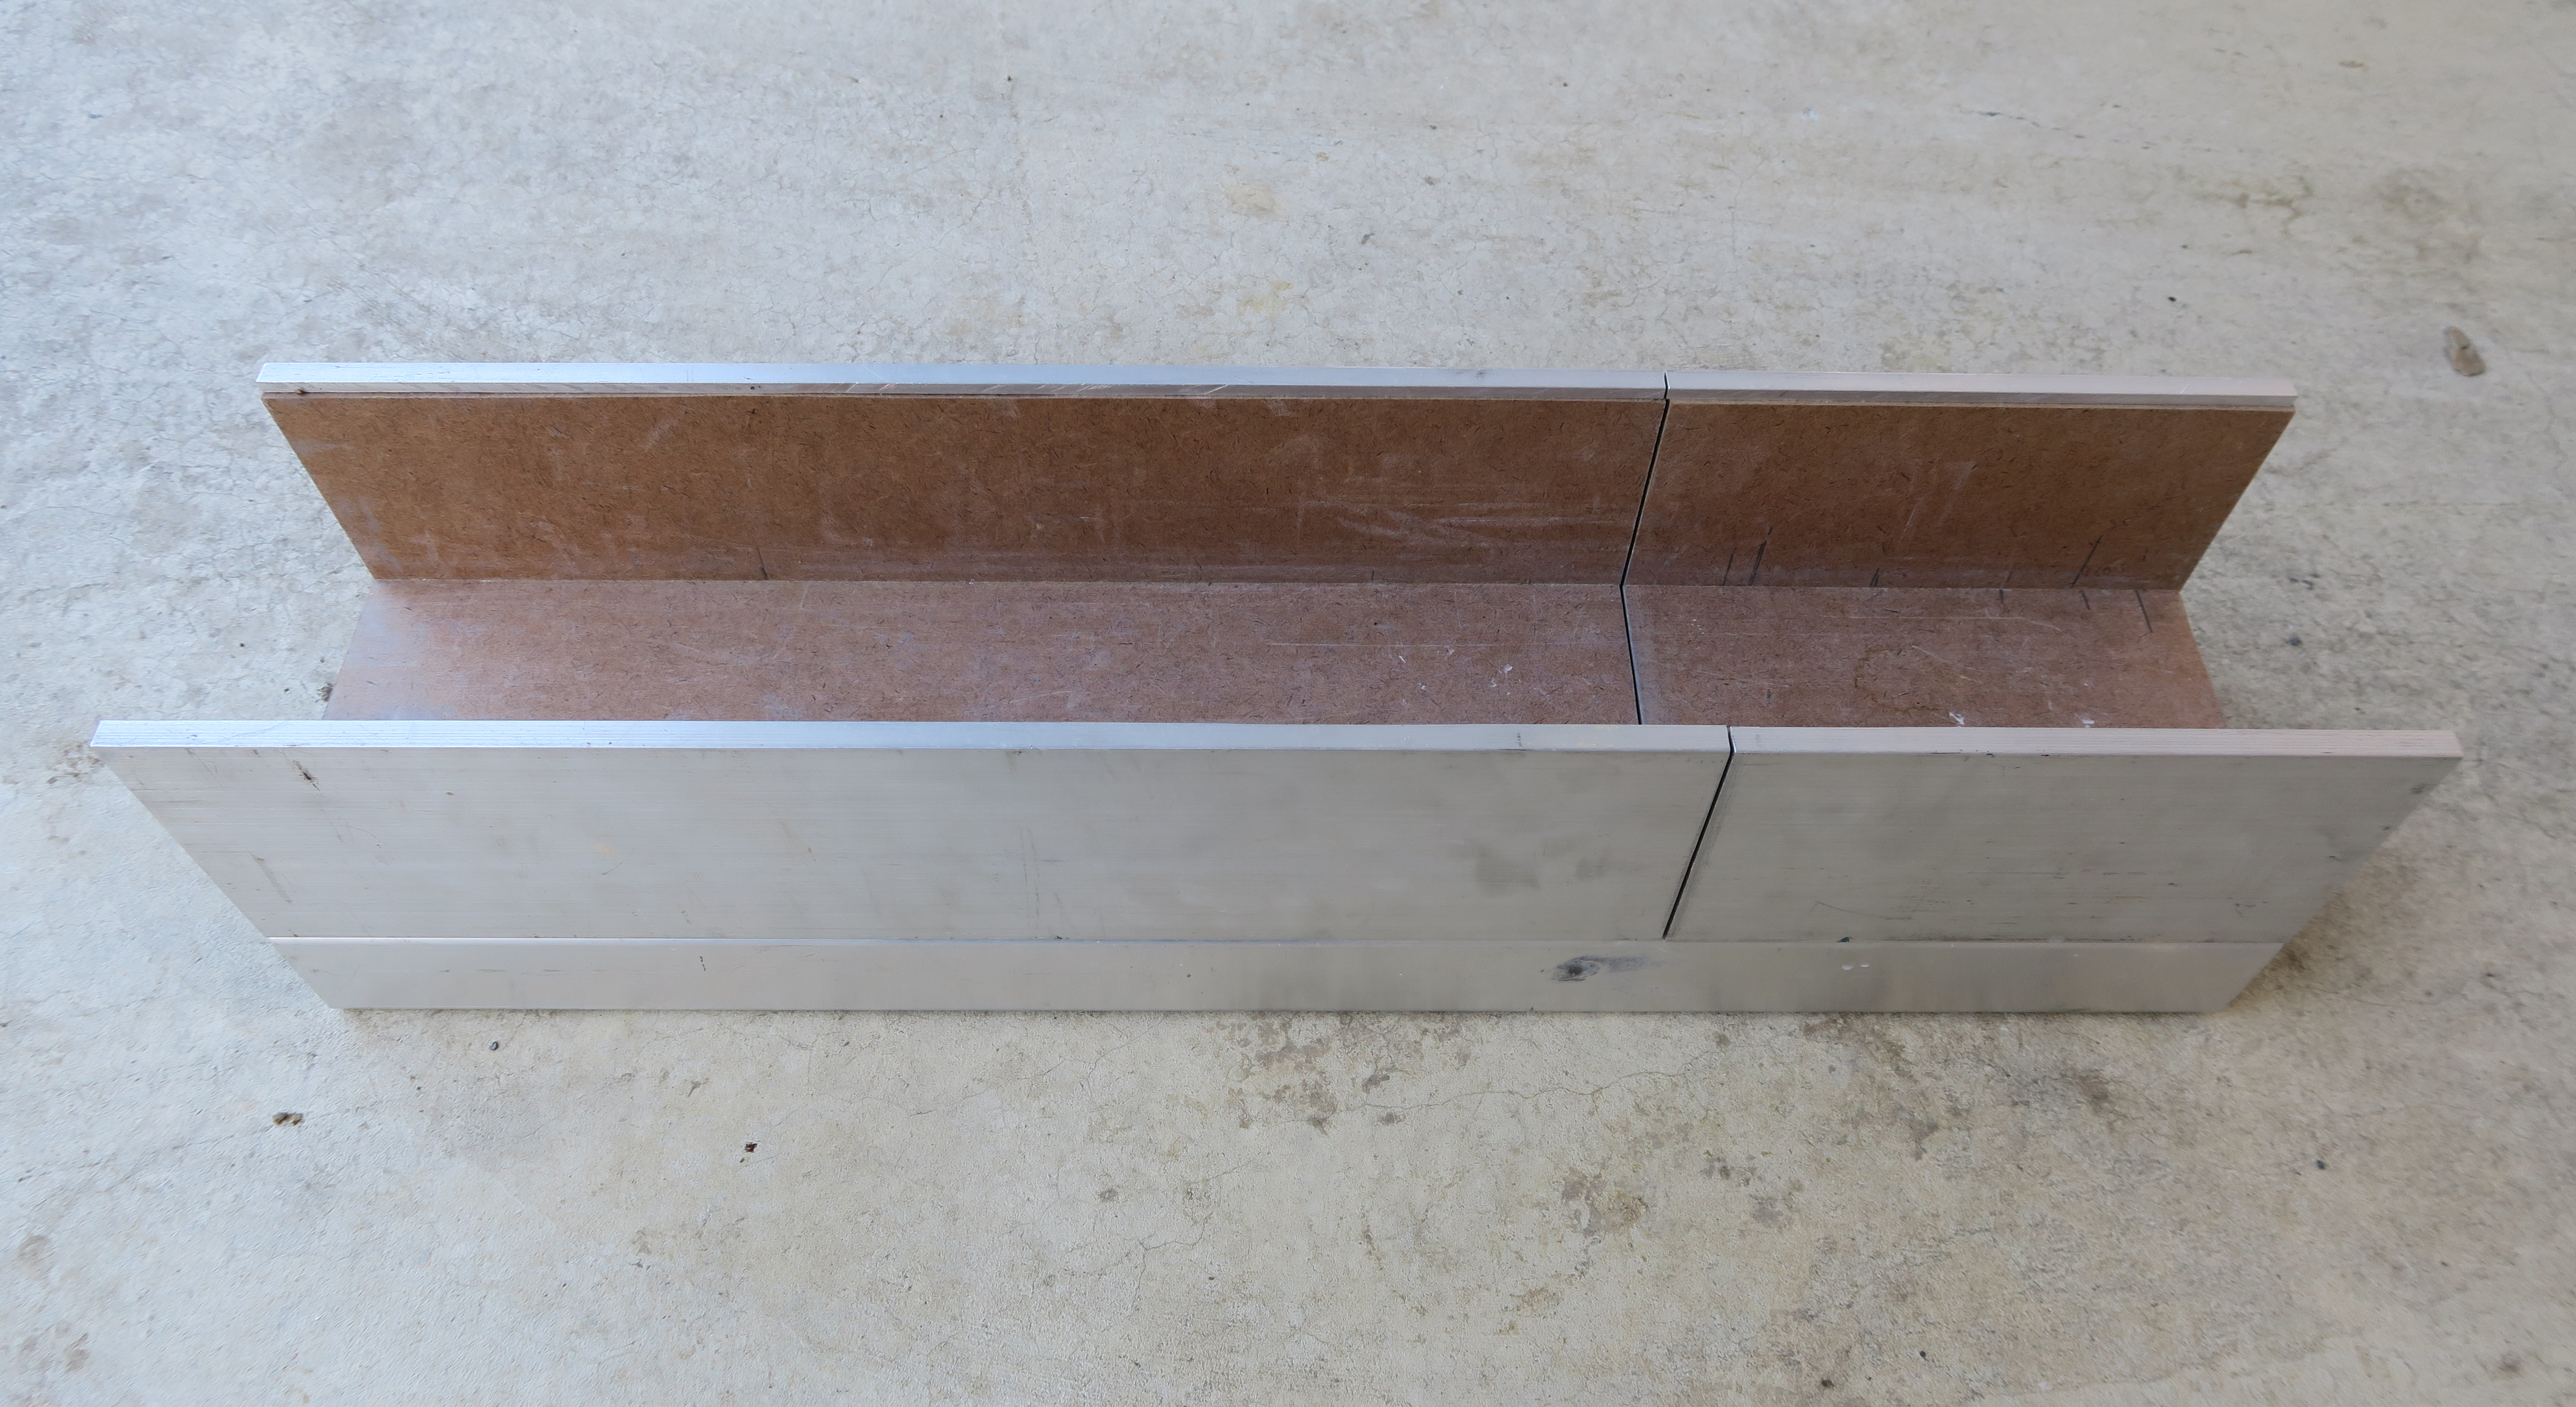
Normal firing (left) and crystaline firing (right)
As a further experiment, I took the lower left-hand corner glaze (lowest silica and alumina) fired in a normal firing (left) and fired with a two hour soak at 1100°C (Right). A network of crystals has entirely covered the surface. This example shows the importance of testing broadly as the firing schedule can have a dramatic effect on some glazes.
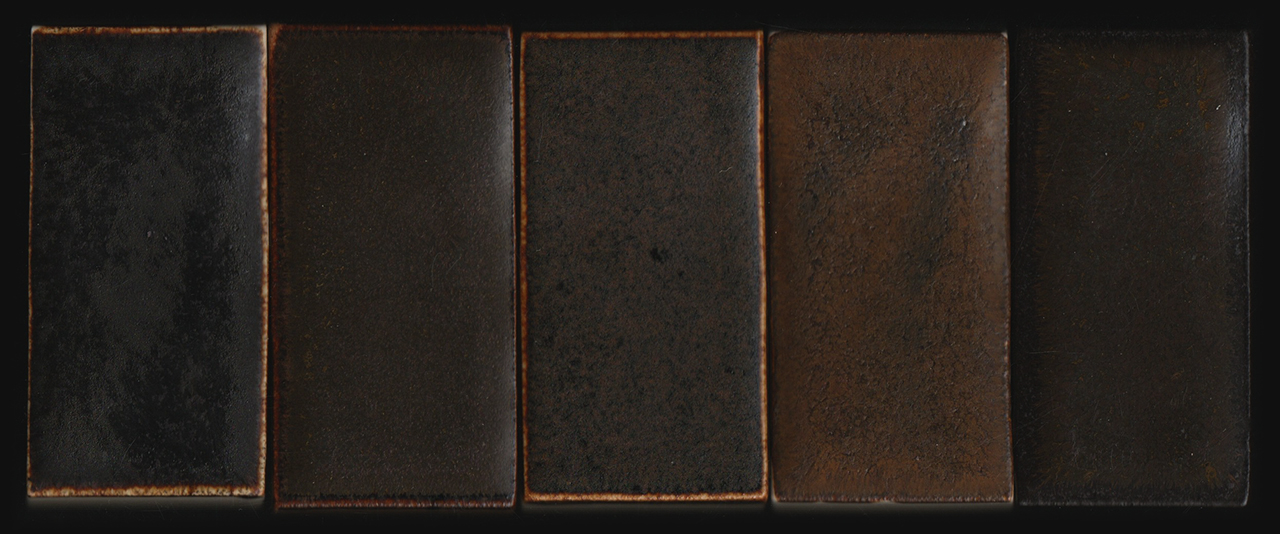
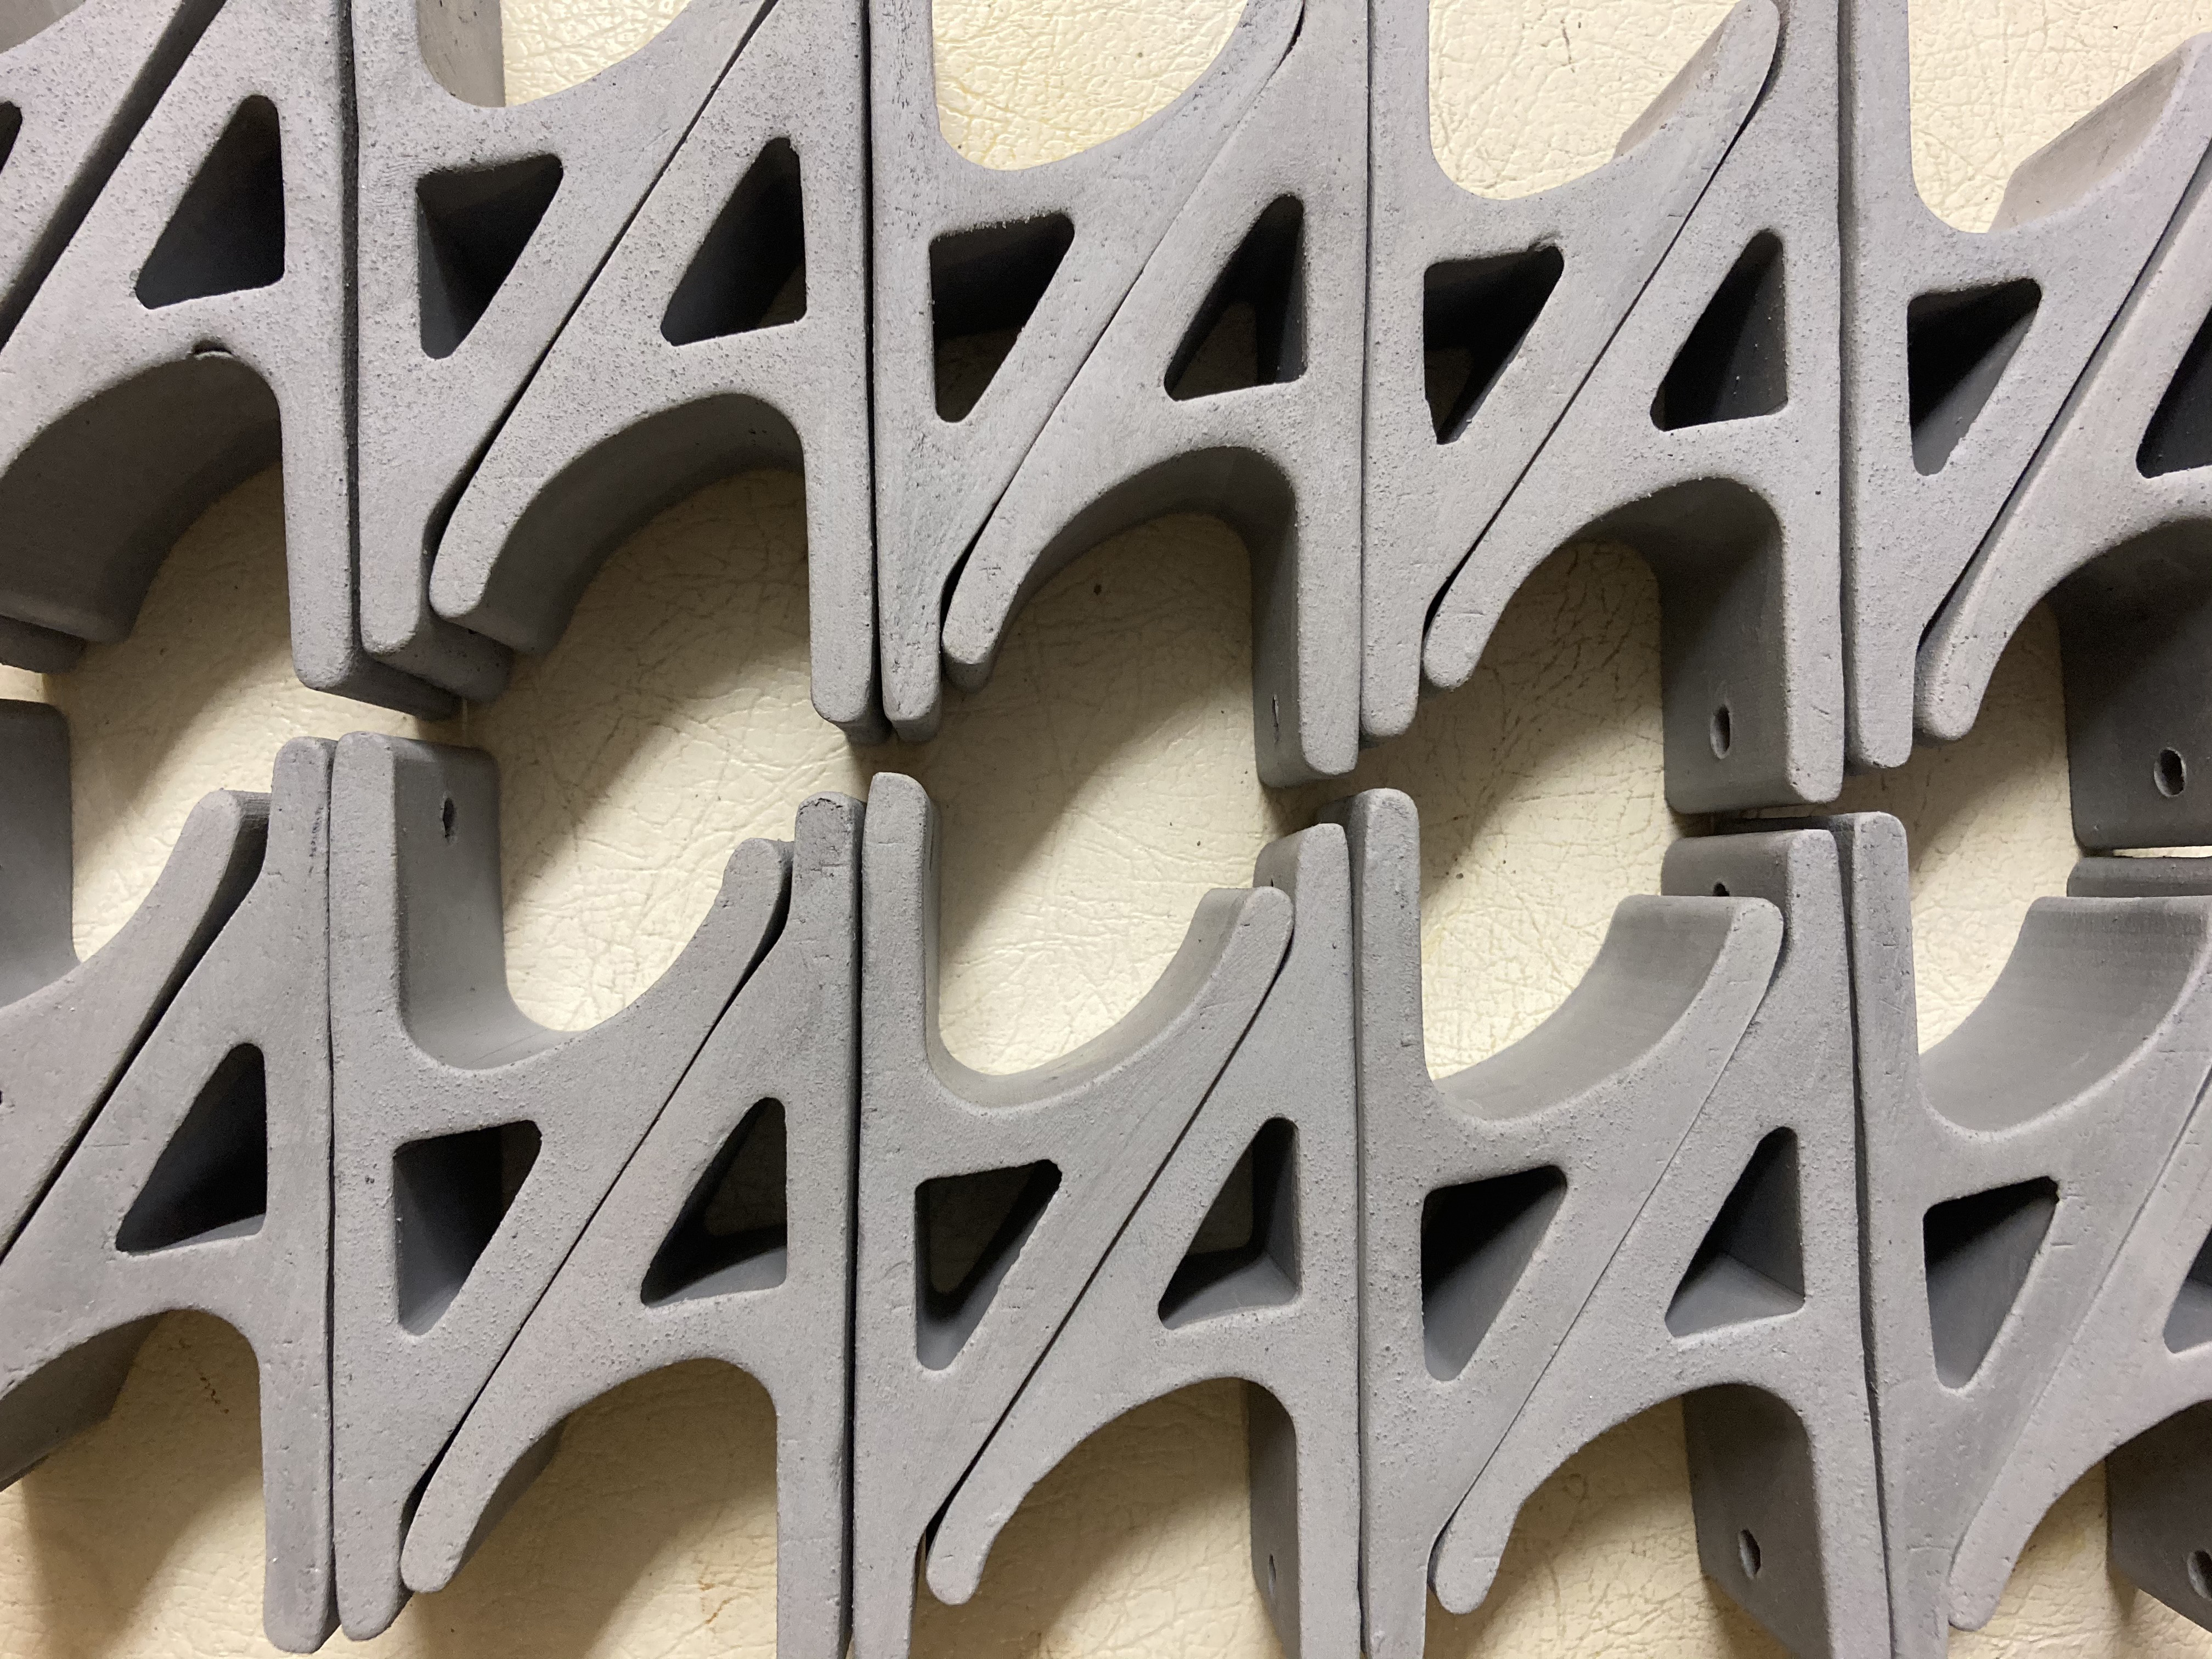
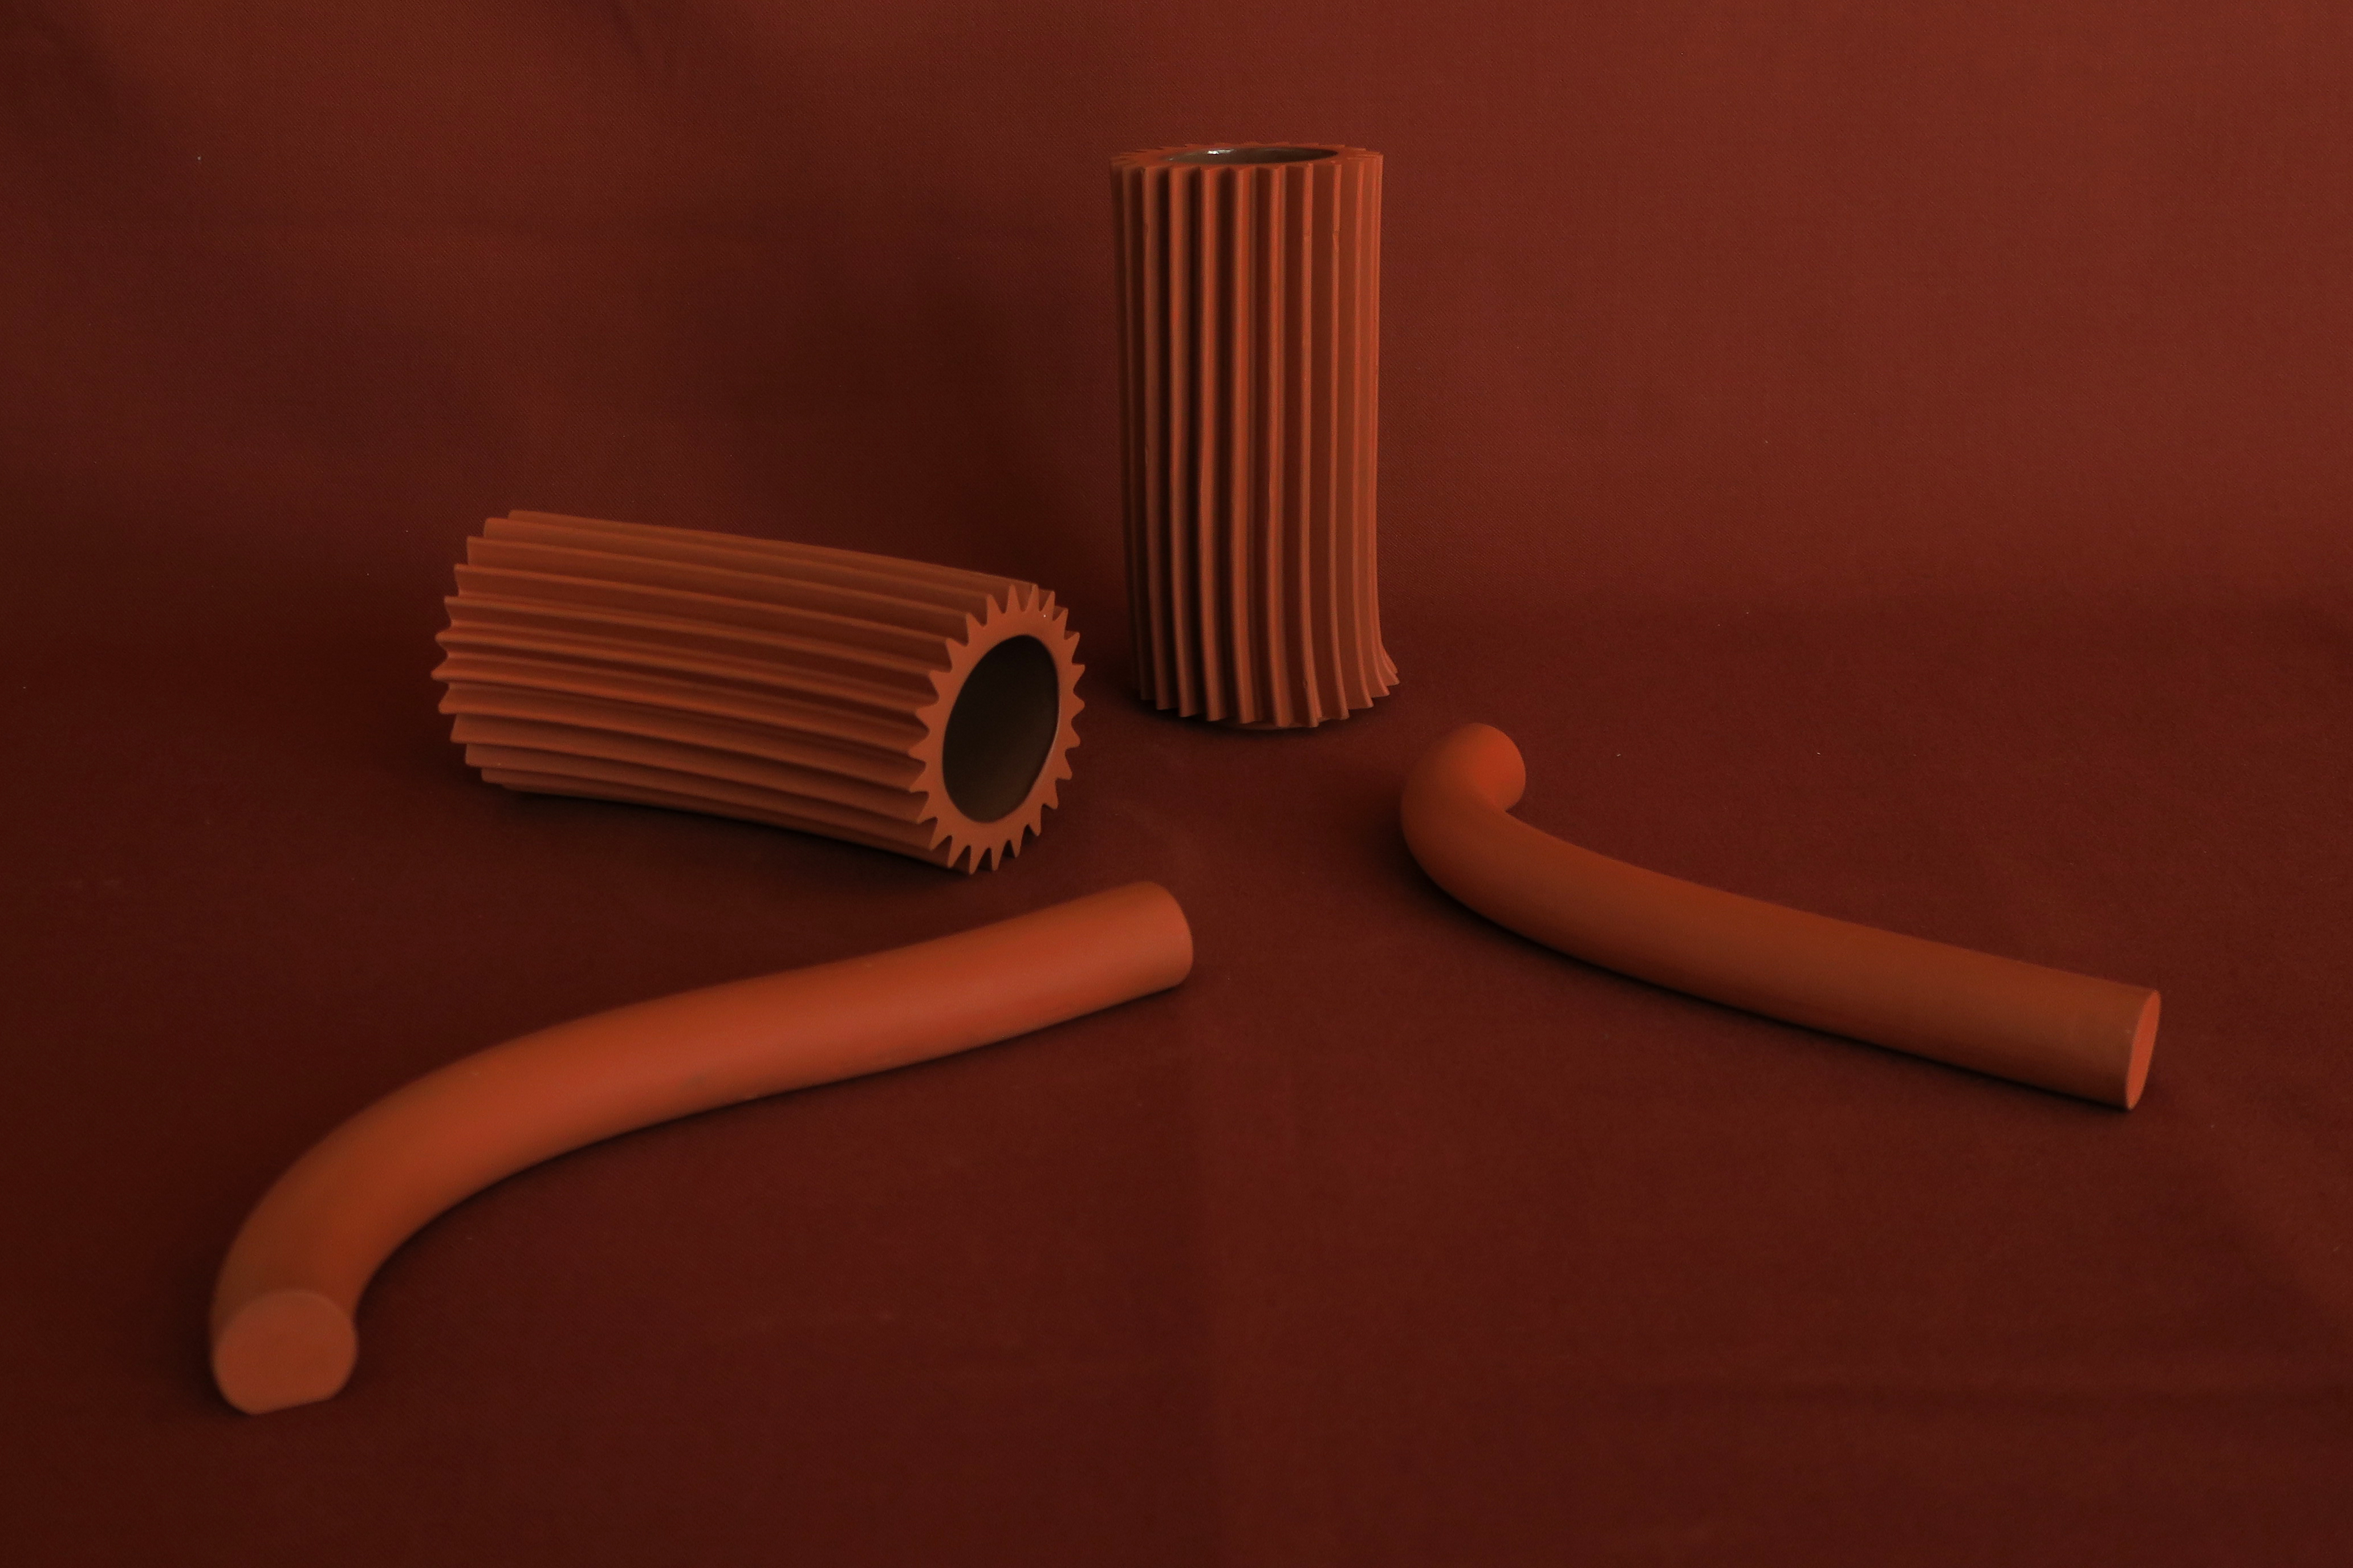
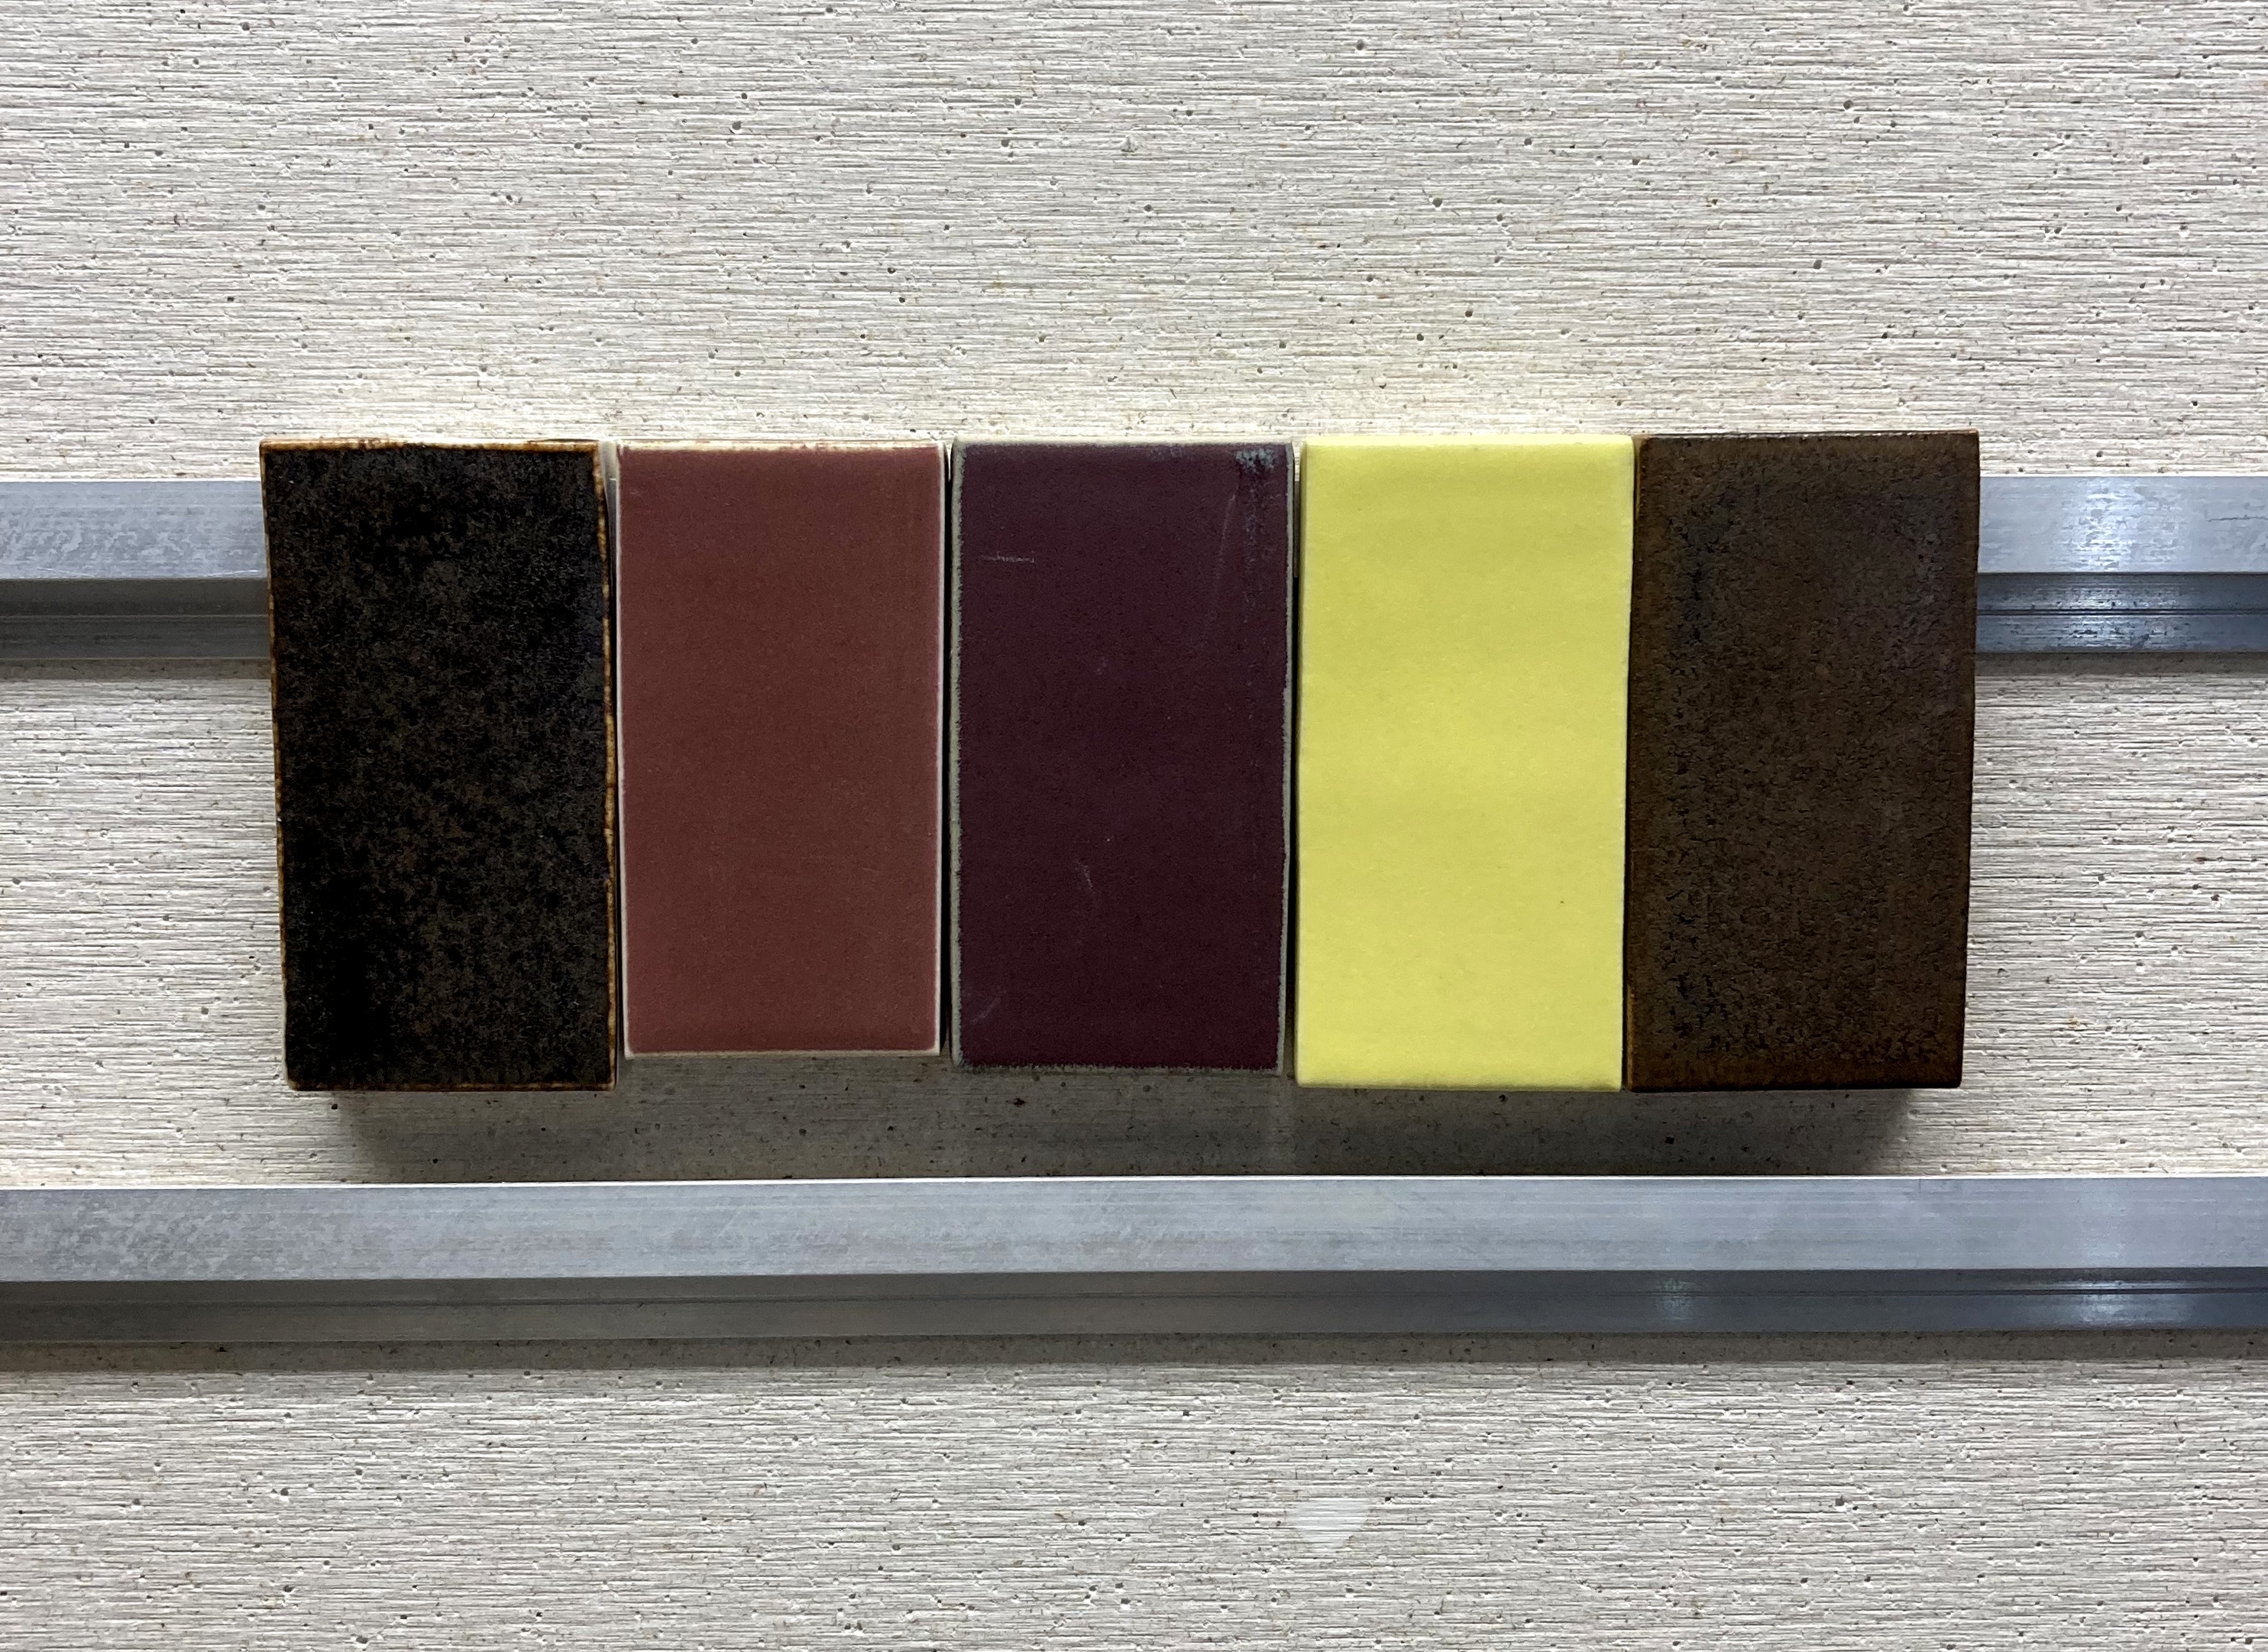
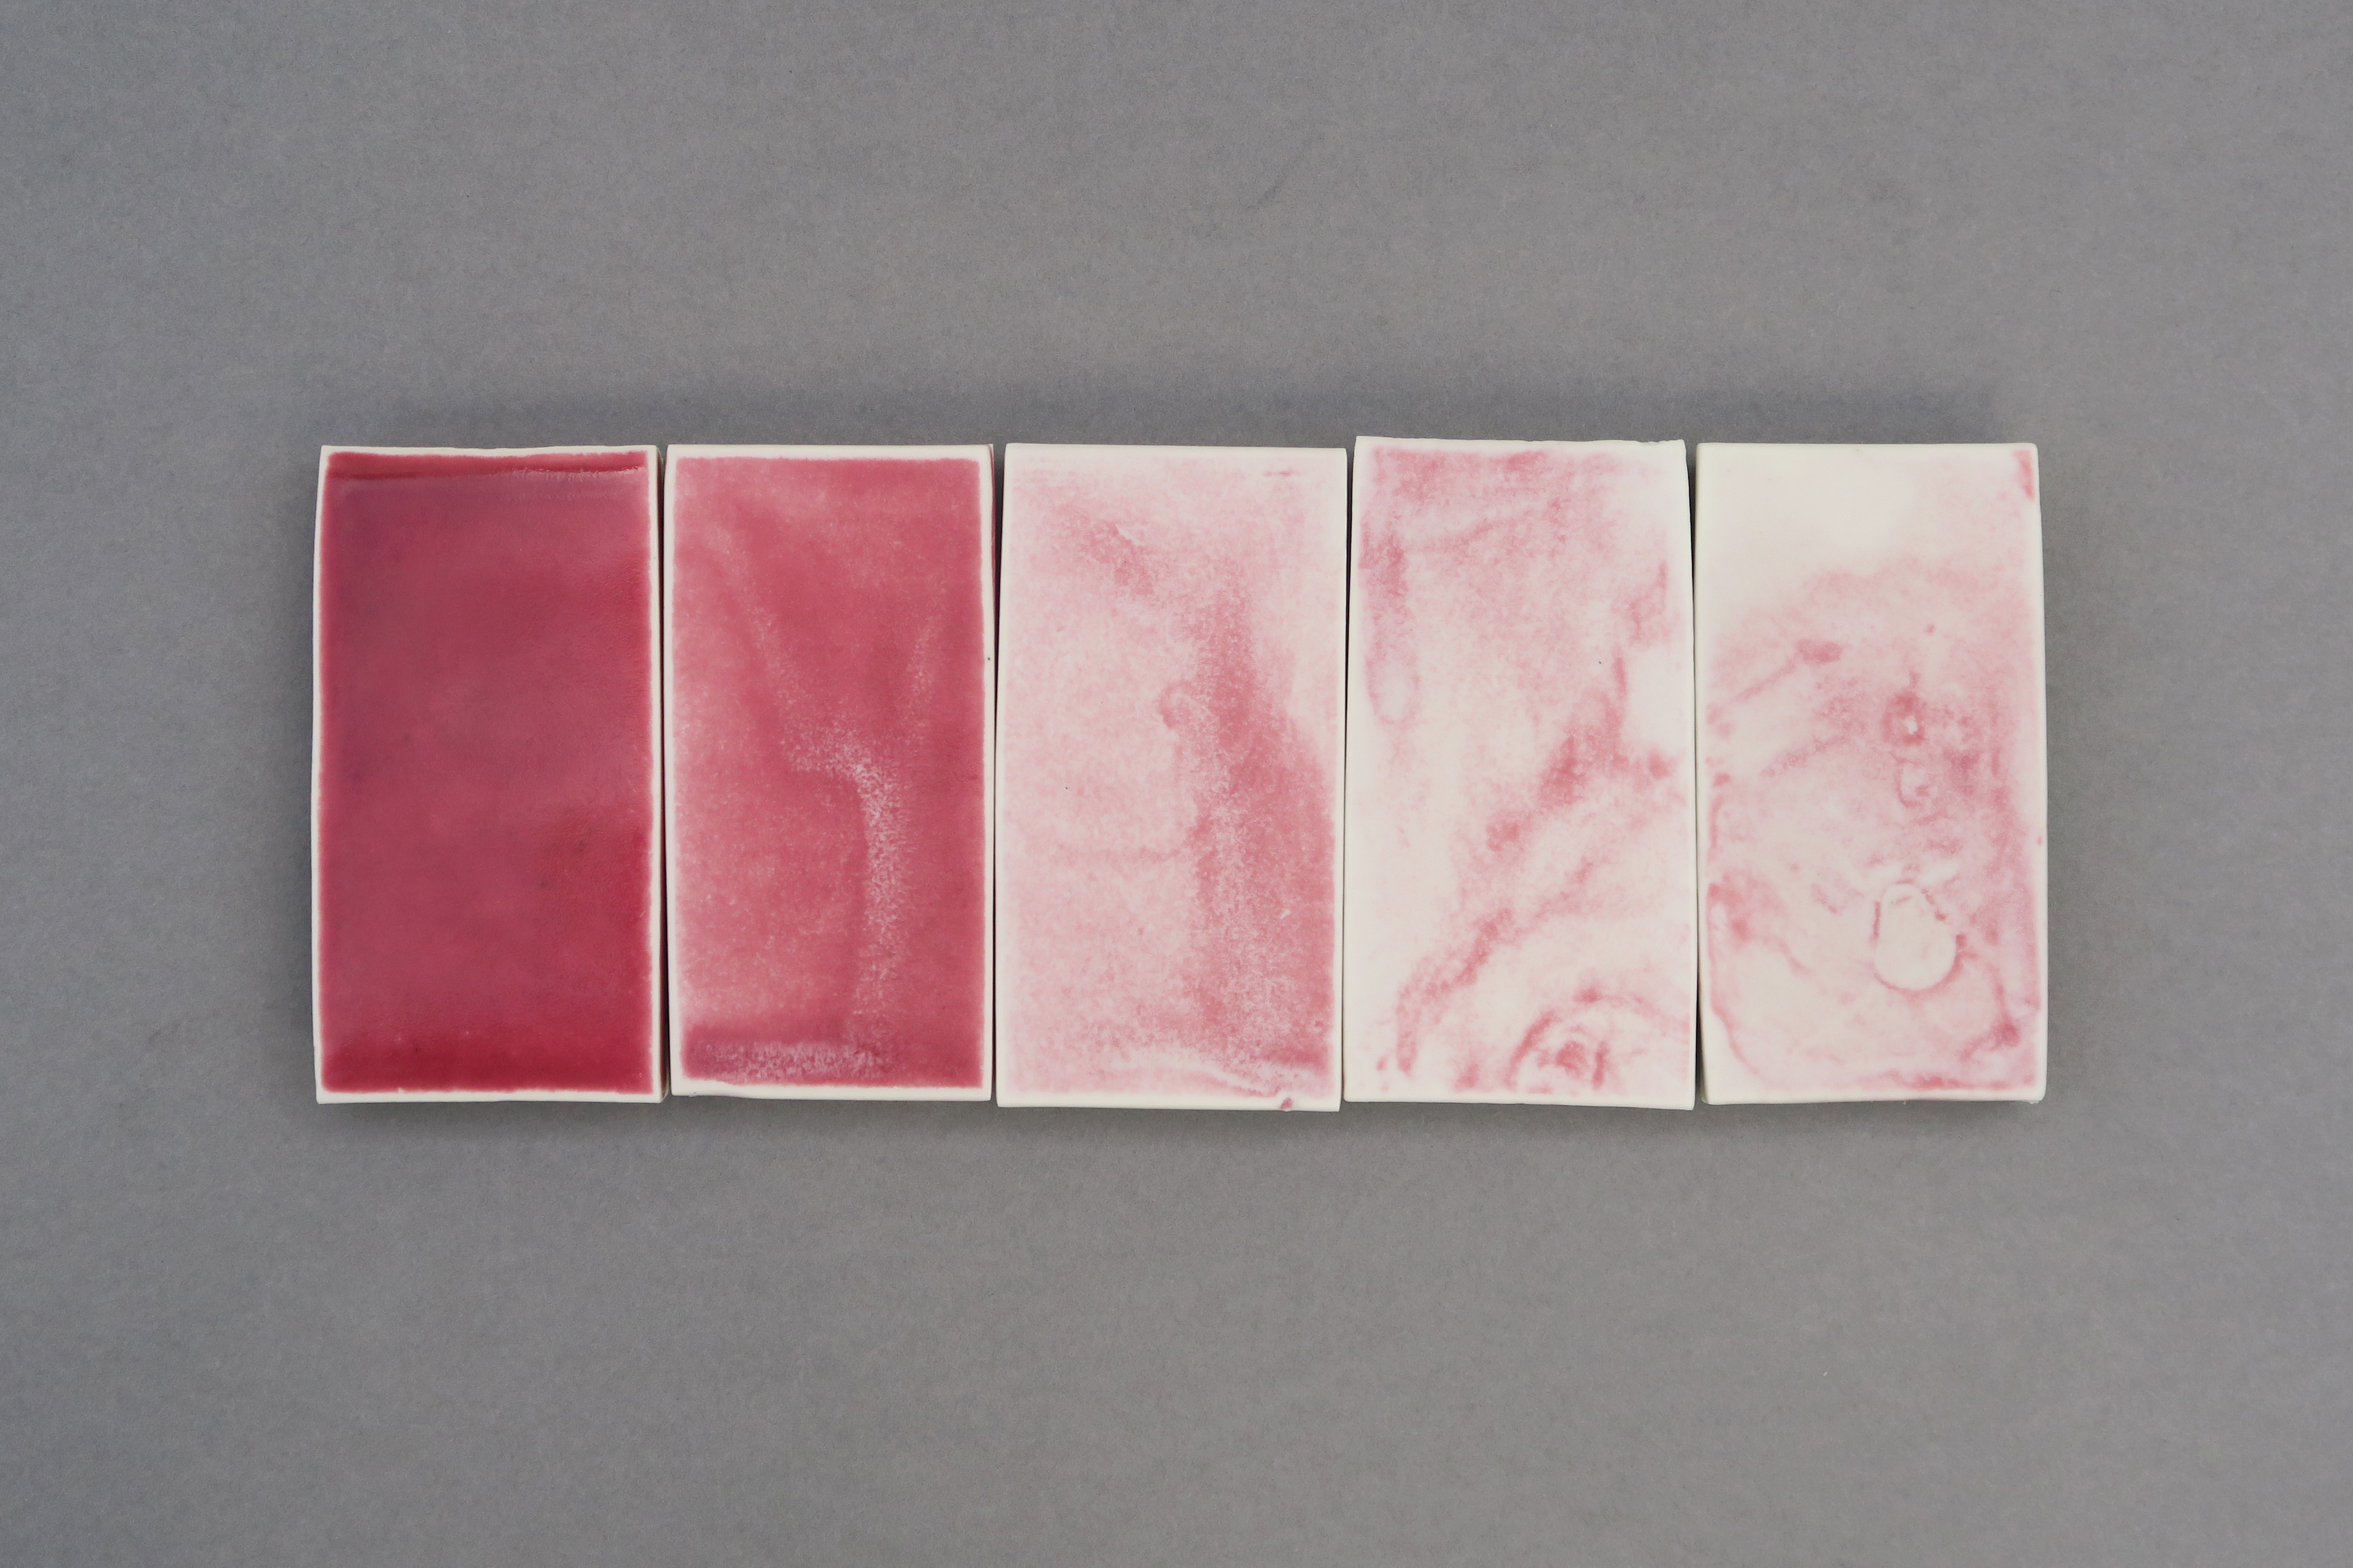
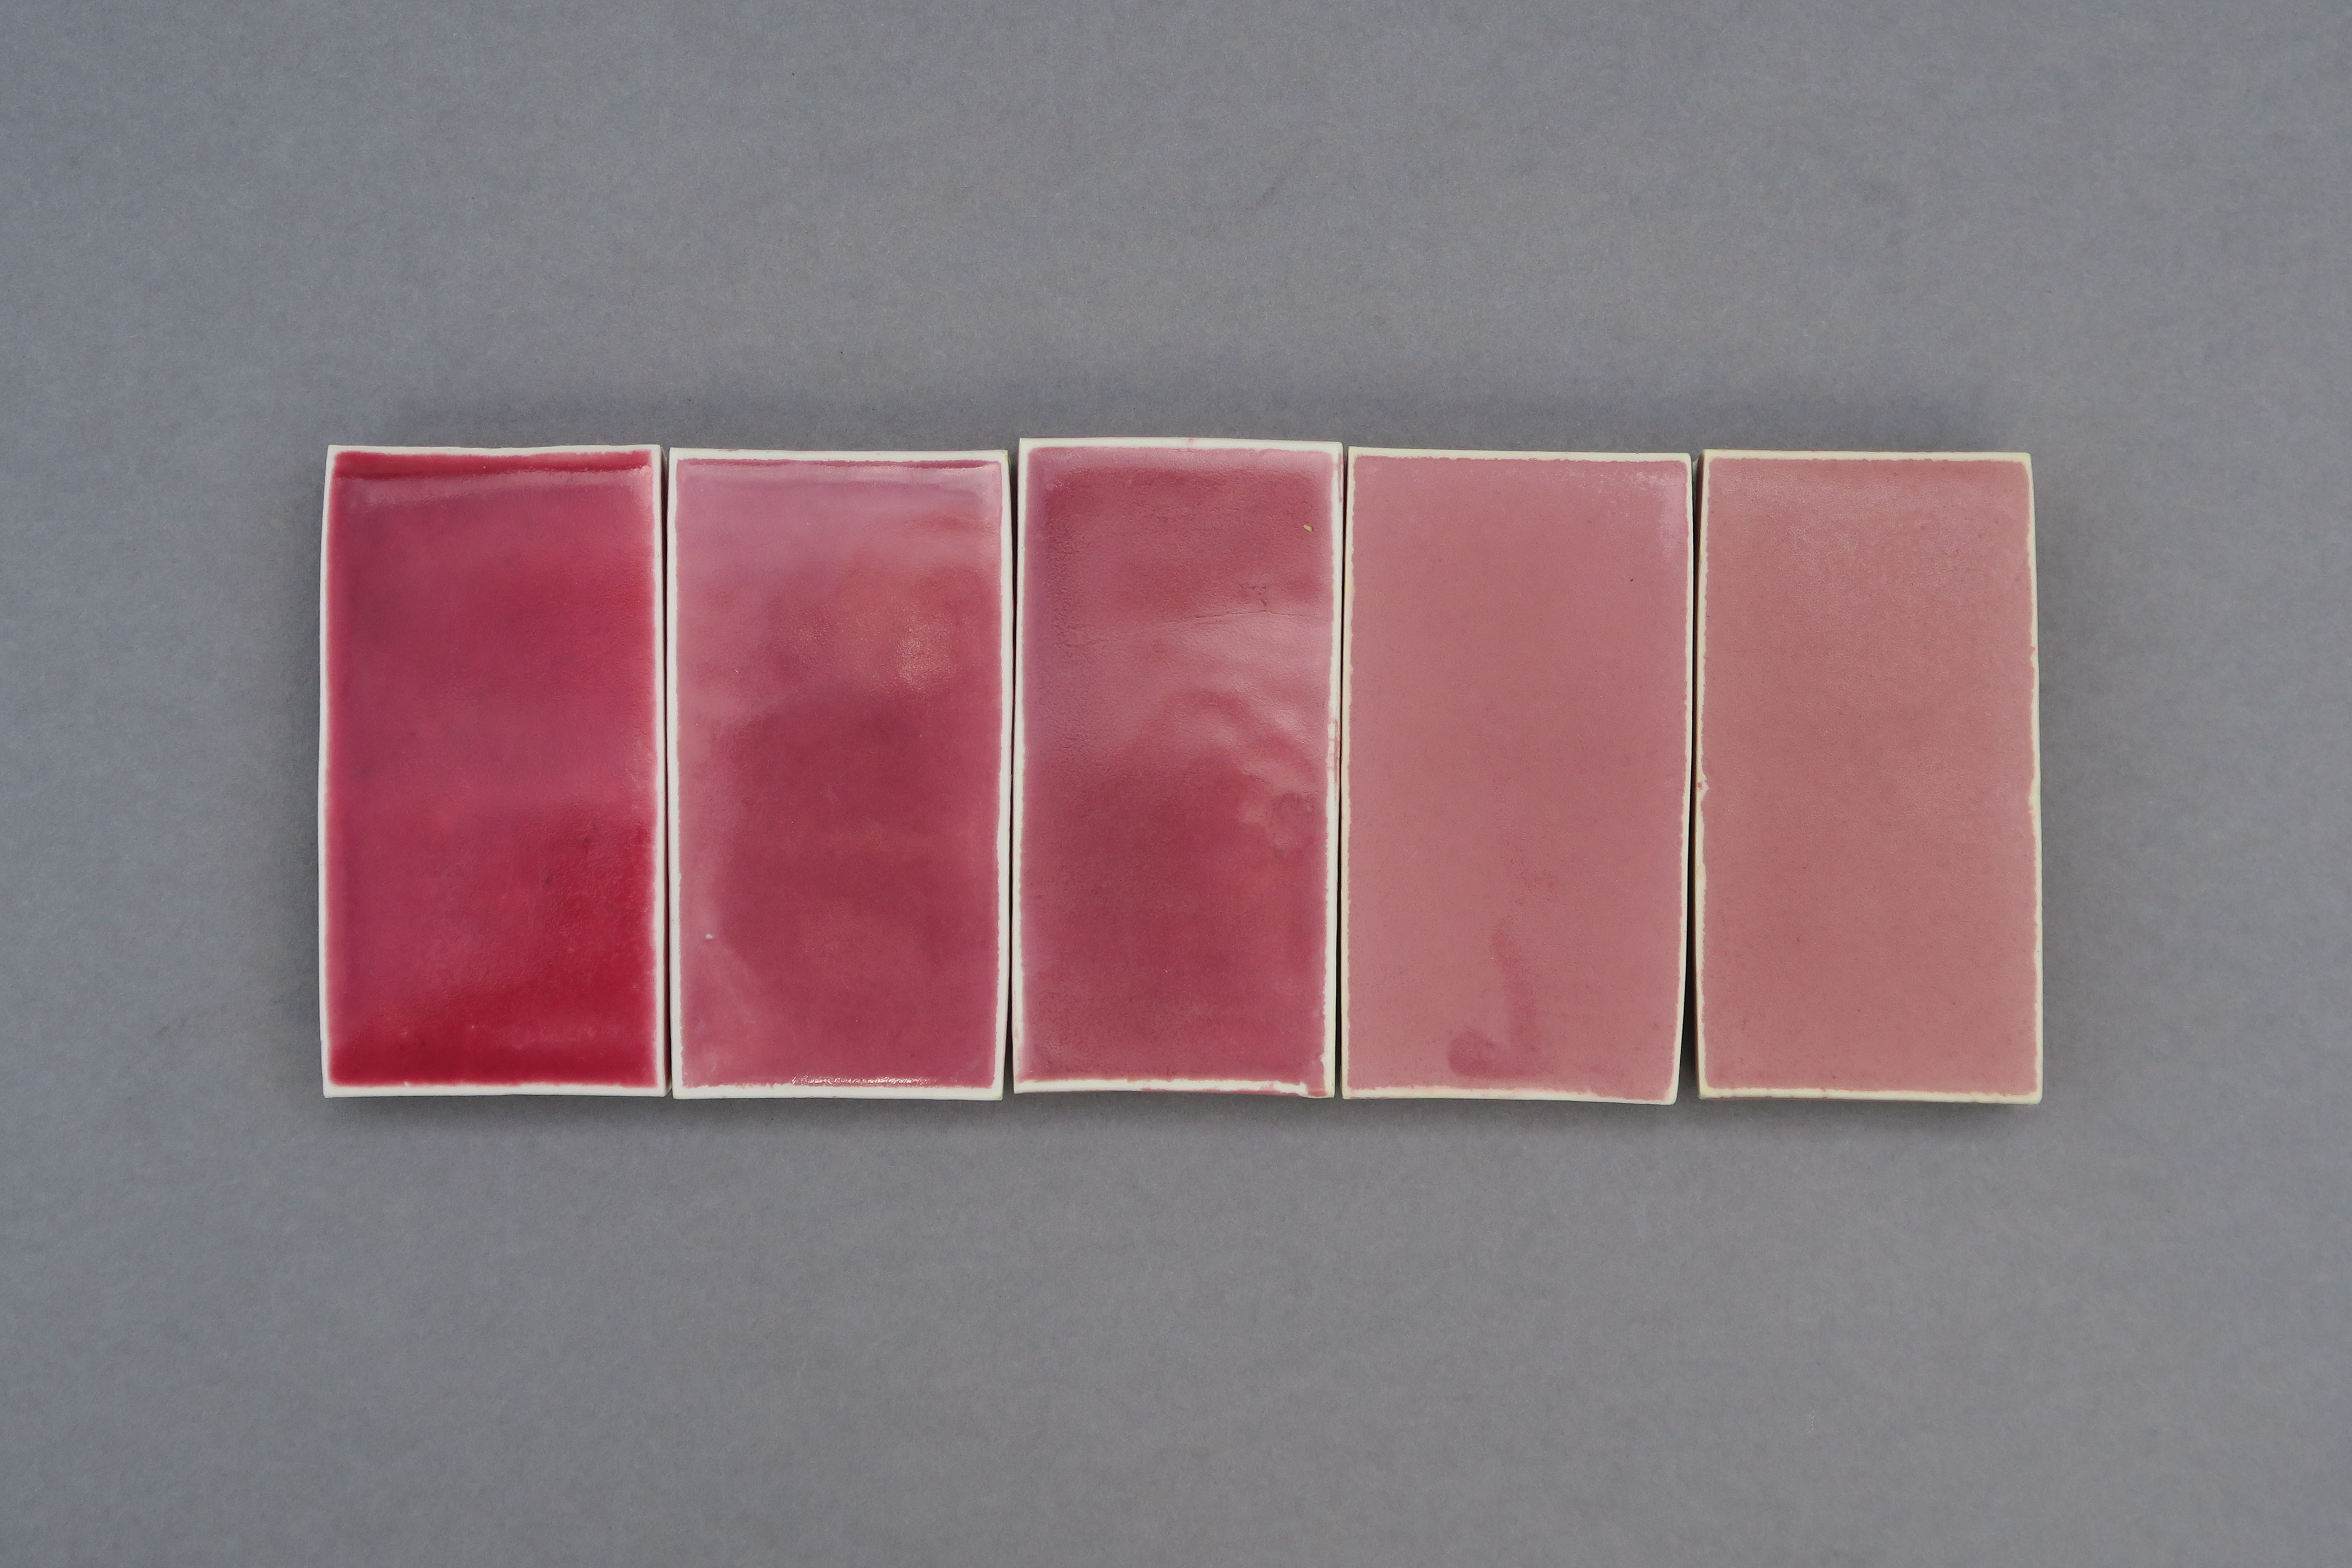
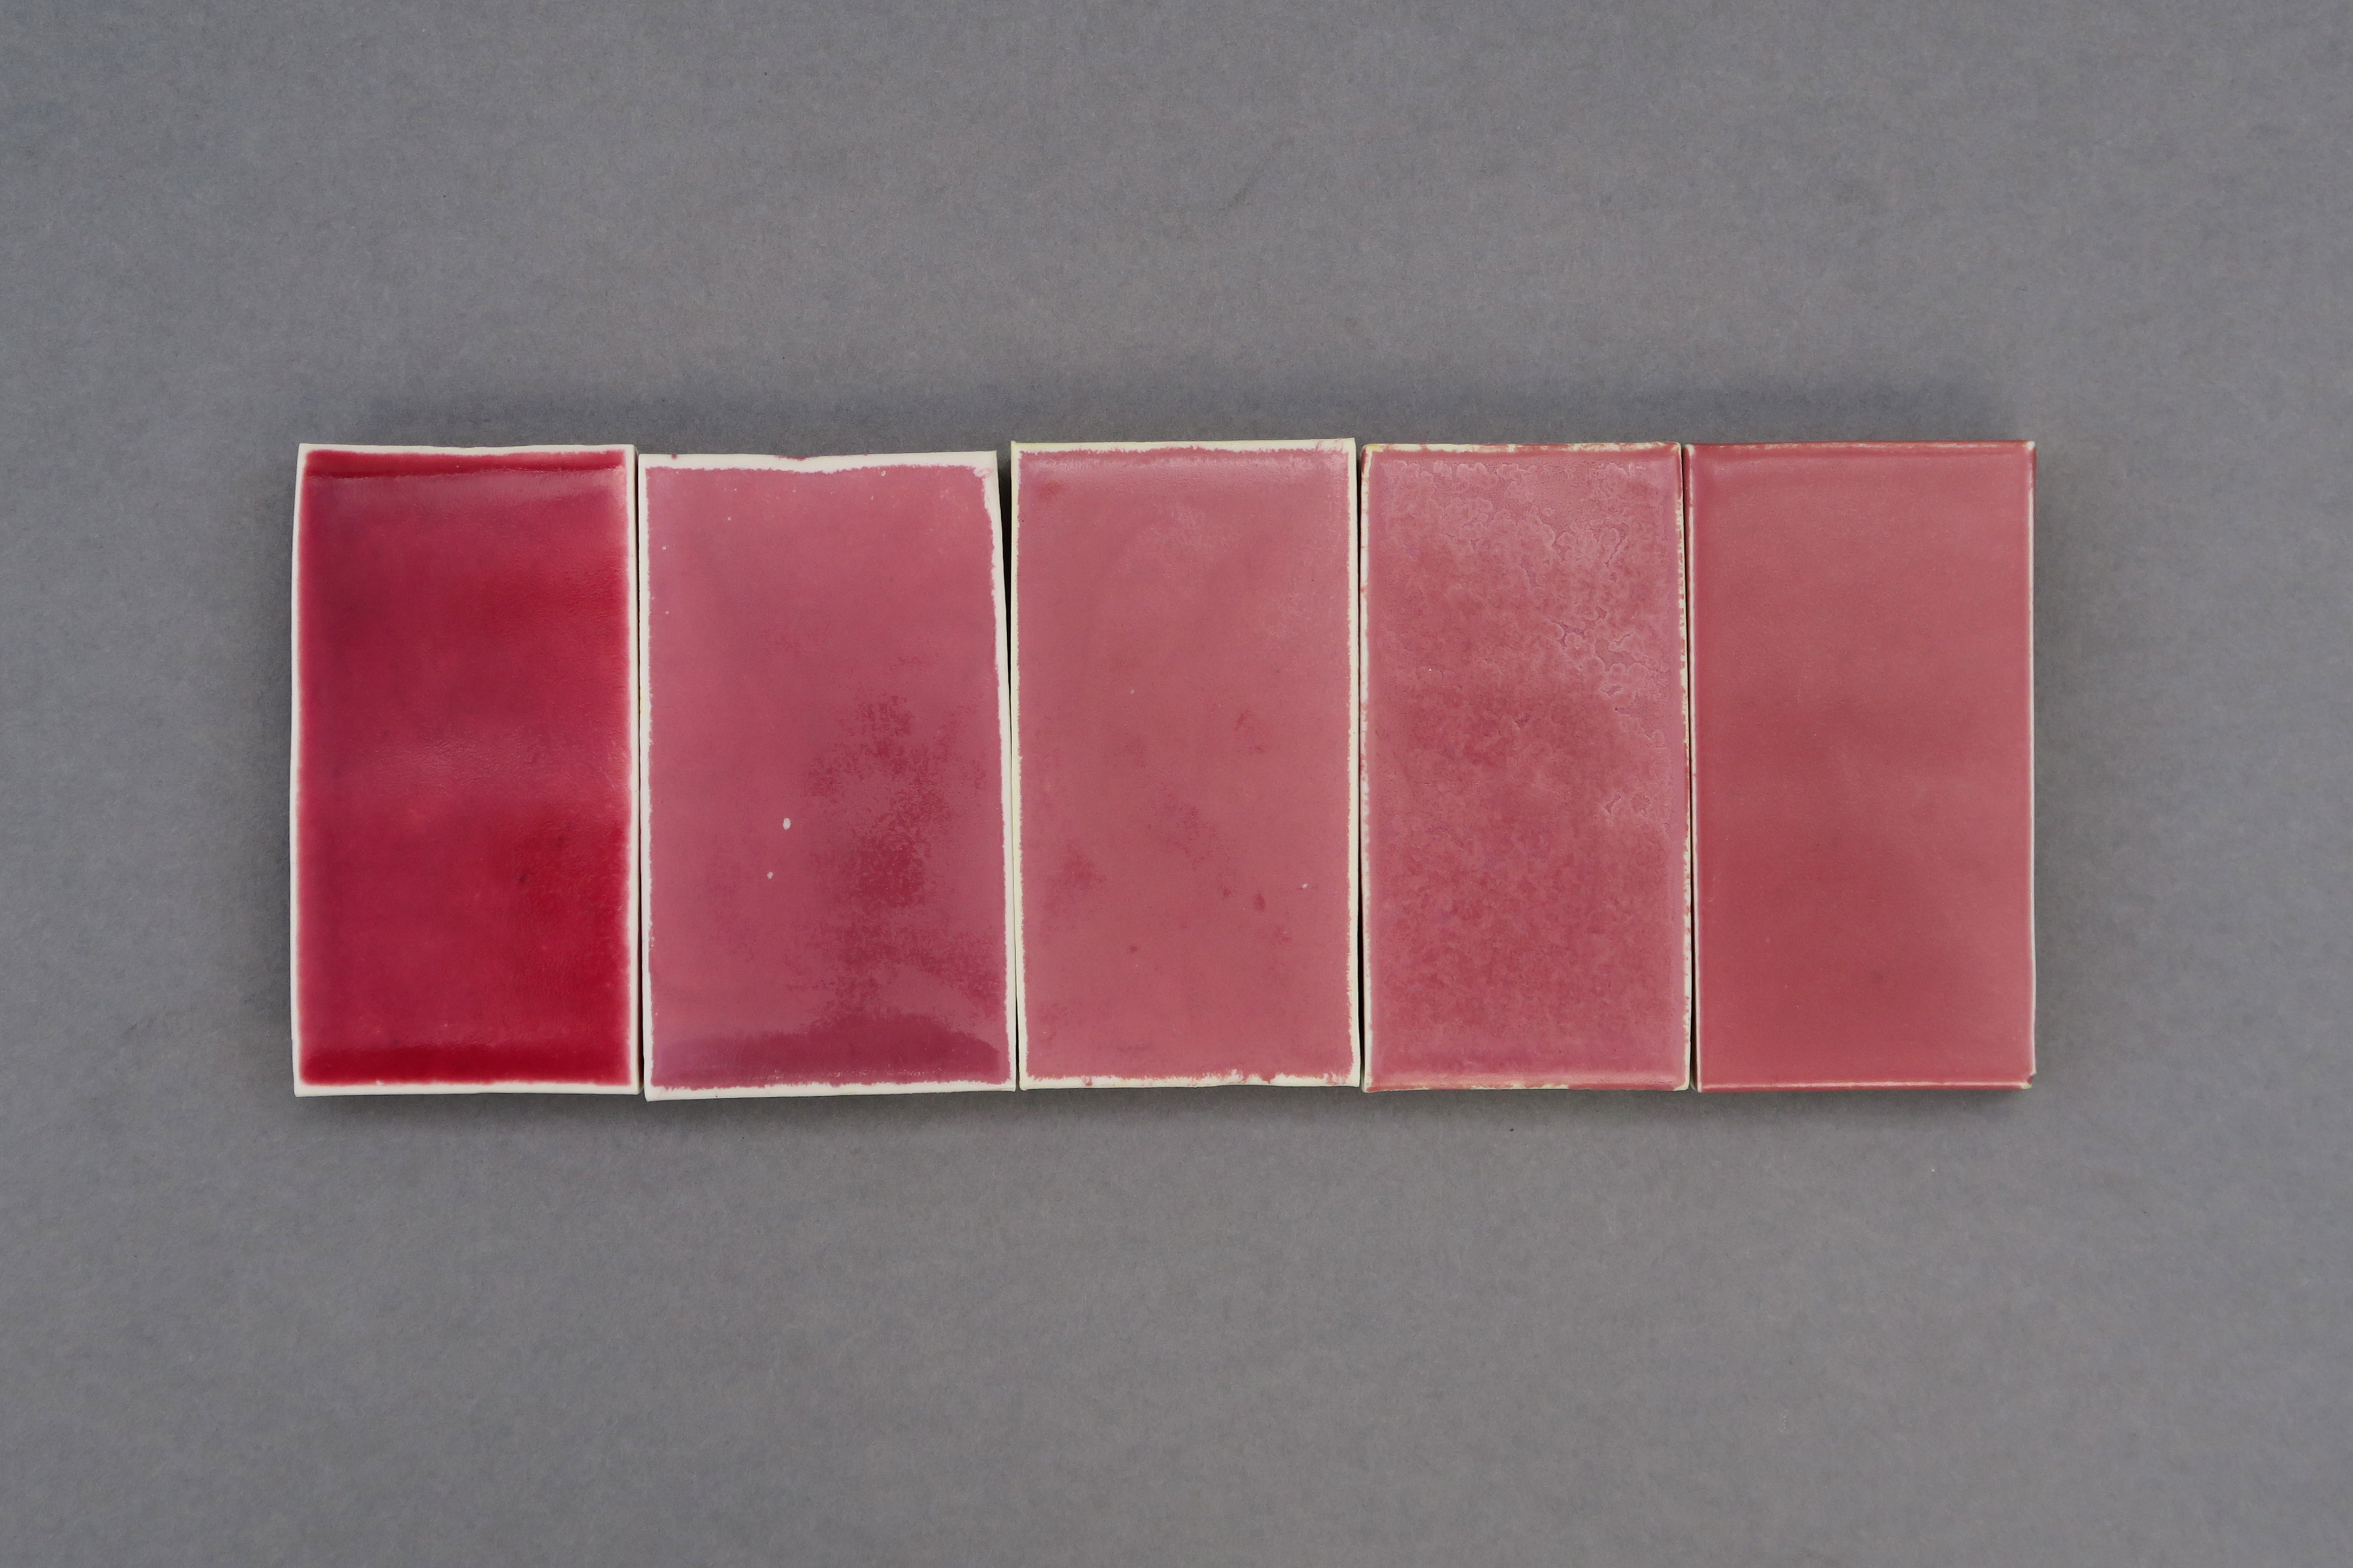
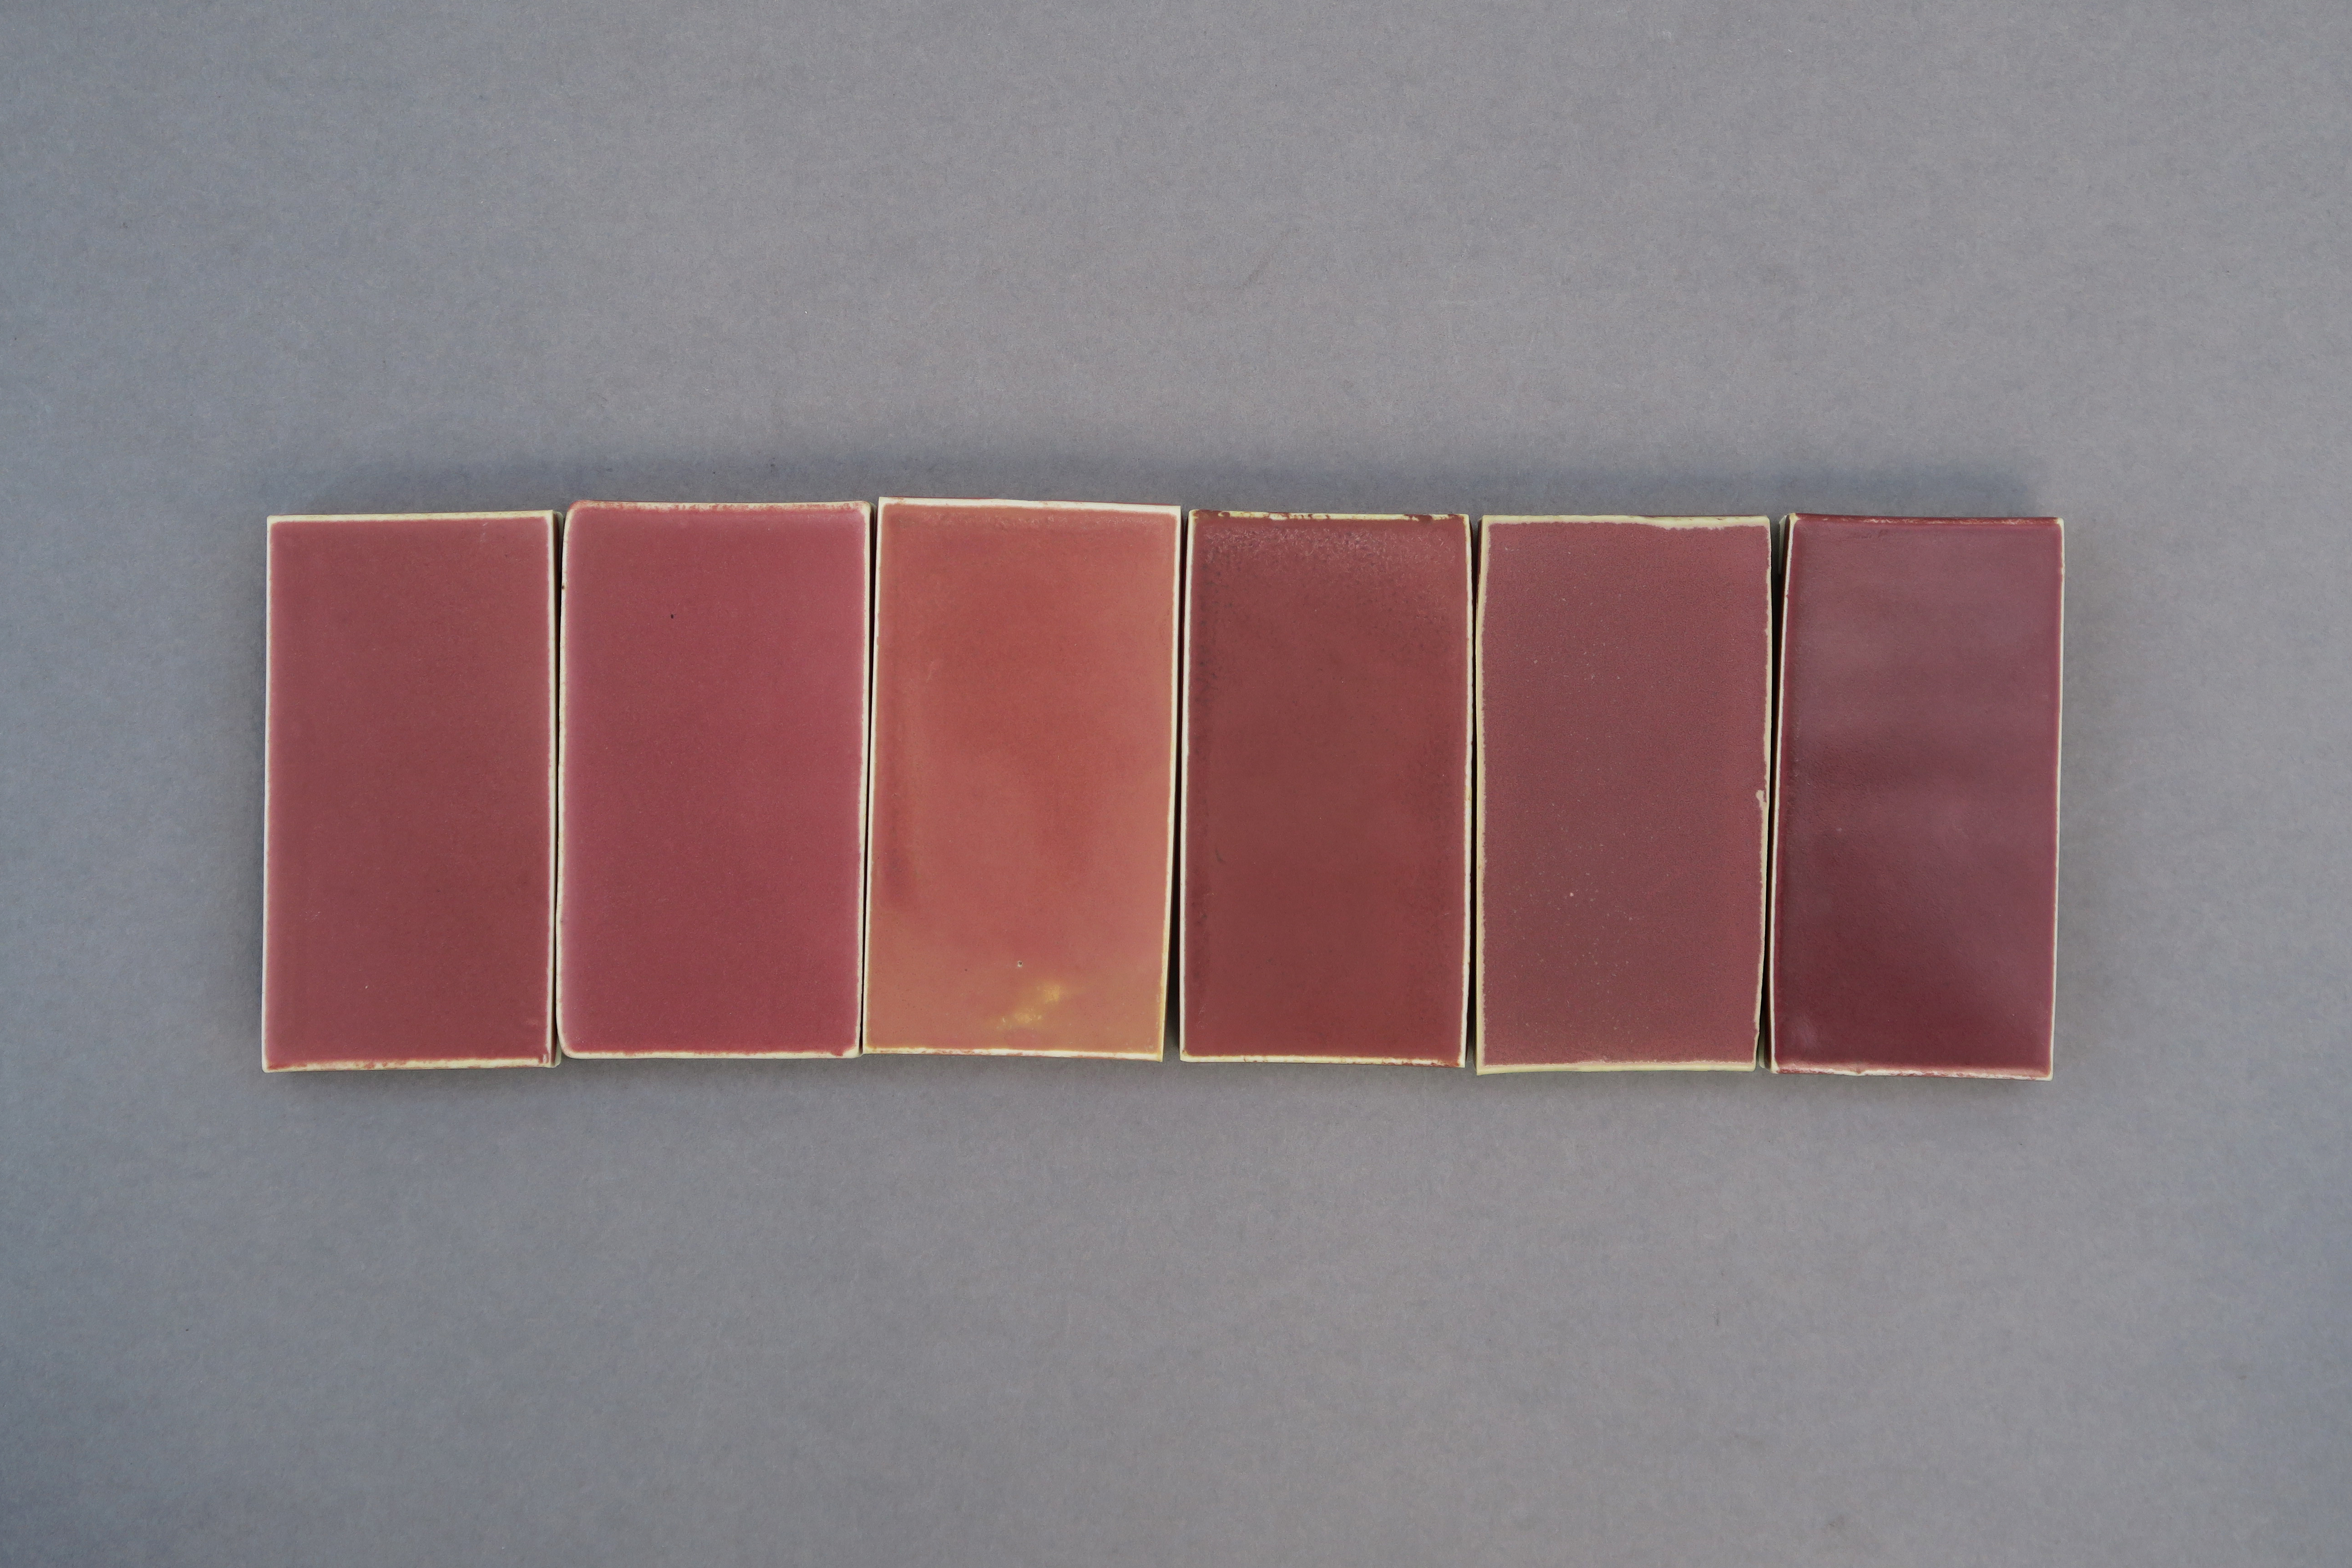
Matte basalt glazes
In this final series of tests (below) I added more alumina to some recipes to make them even more matte and applied some to a black clay body to give a darker appearance overall. By understanding the chemistry of both glazes and geology it's possible to create ceramic ware specific to its geographical context. Taking what once was liquid lava and remelting it into a functional glaze, these tests begin to form a visual language informed both aesthetically and materially by the geology of Tāmaki Makaurau